 Today I am going to share with you my recipe for Honey Wheat Rolls. This can also be used to make loaves of Honey Wheat Bread. It is so versatile and such an amazing whole wheat dough that I will be showing you 5 different ways to shape your dough into fun and interesting shapes! I even made a small batch of cinnamon rolls with it! Of course, the options are limitless, but hopefully these will inspire you to experiment with your whole grain bread baking!
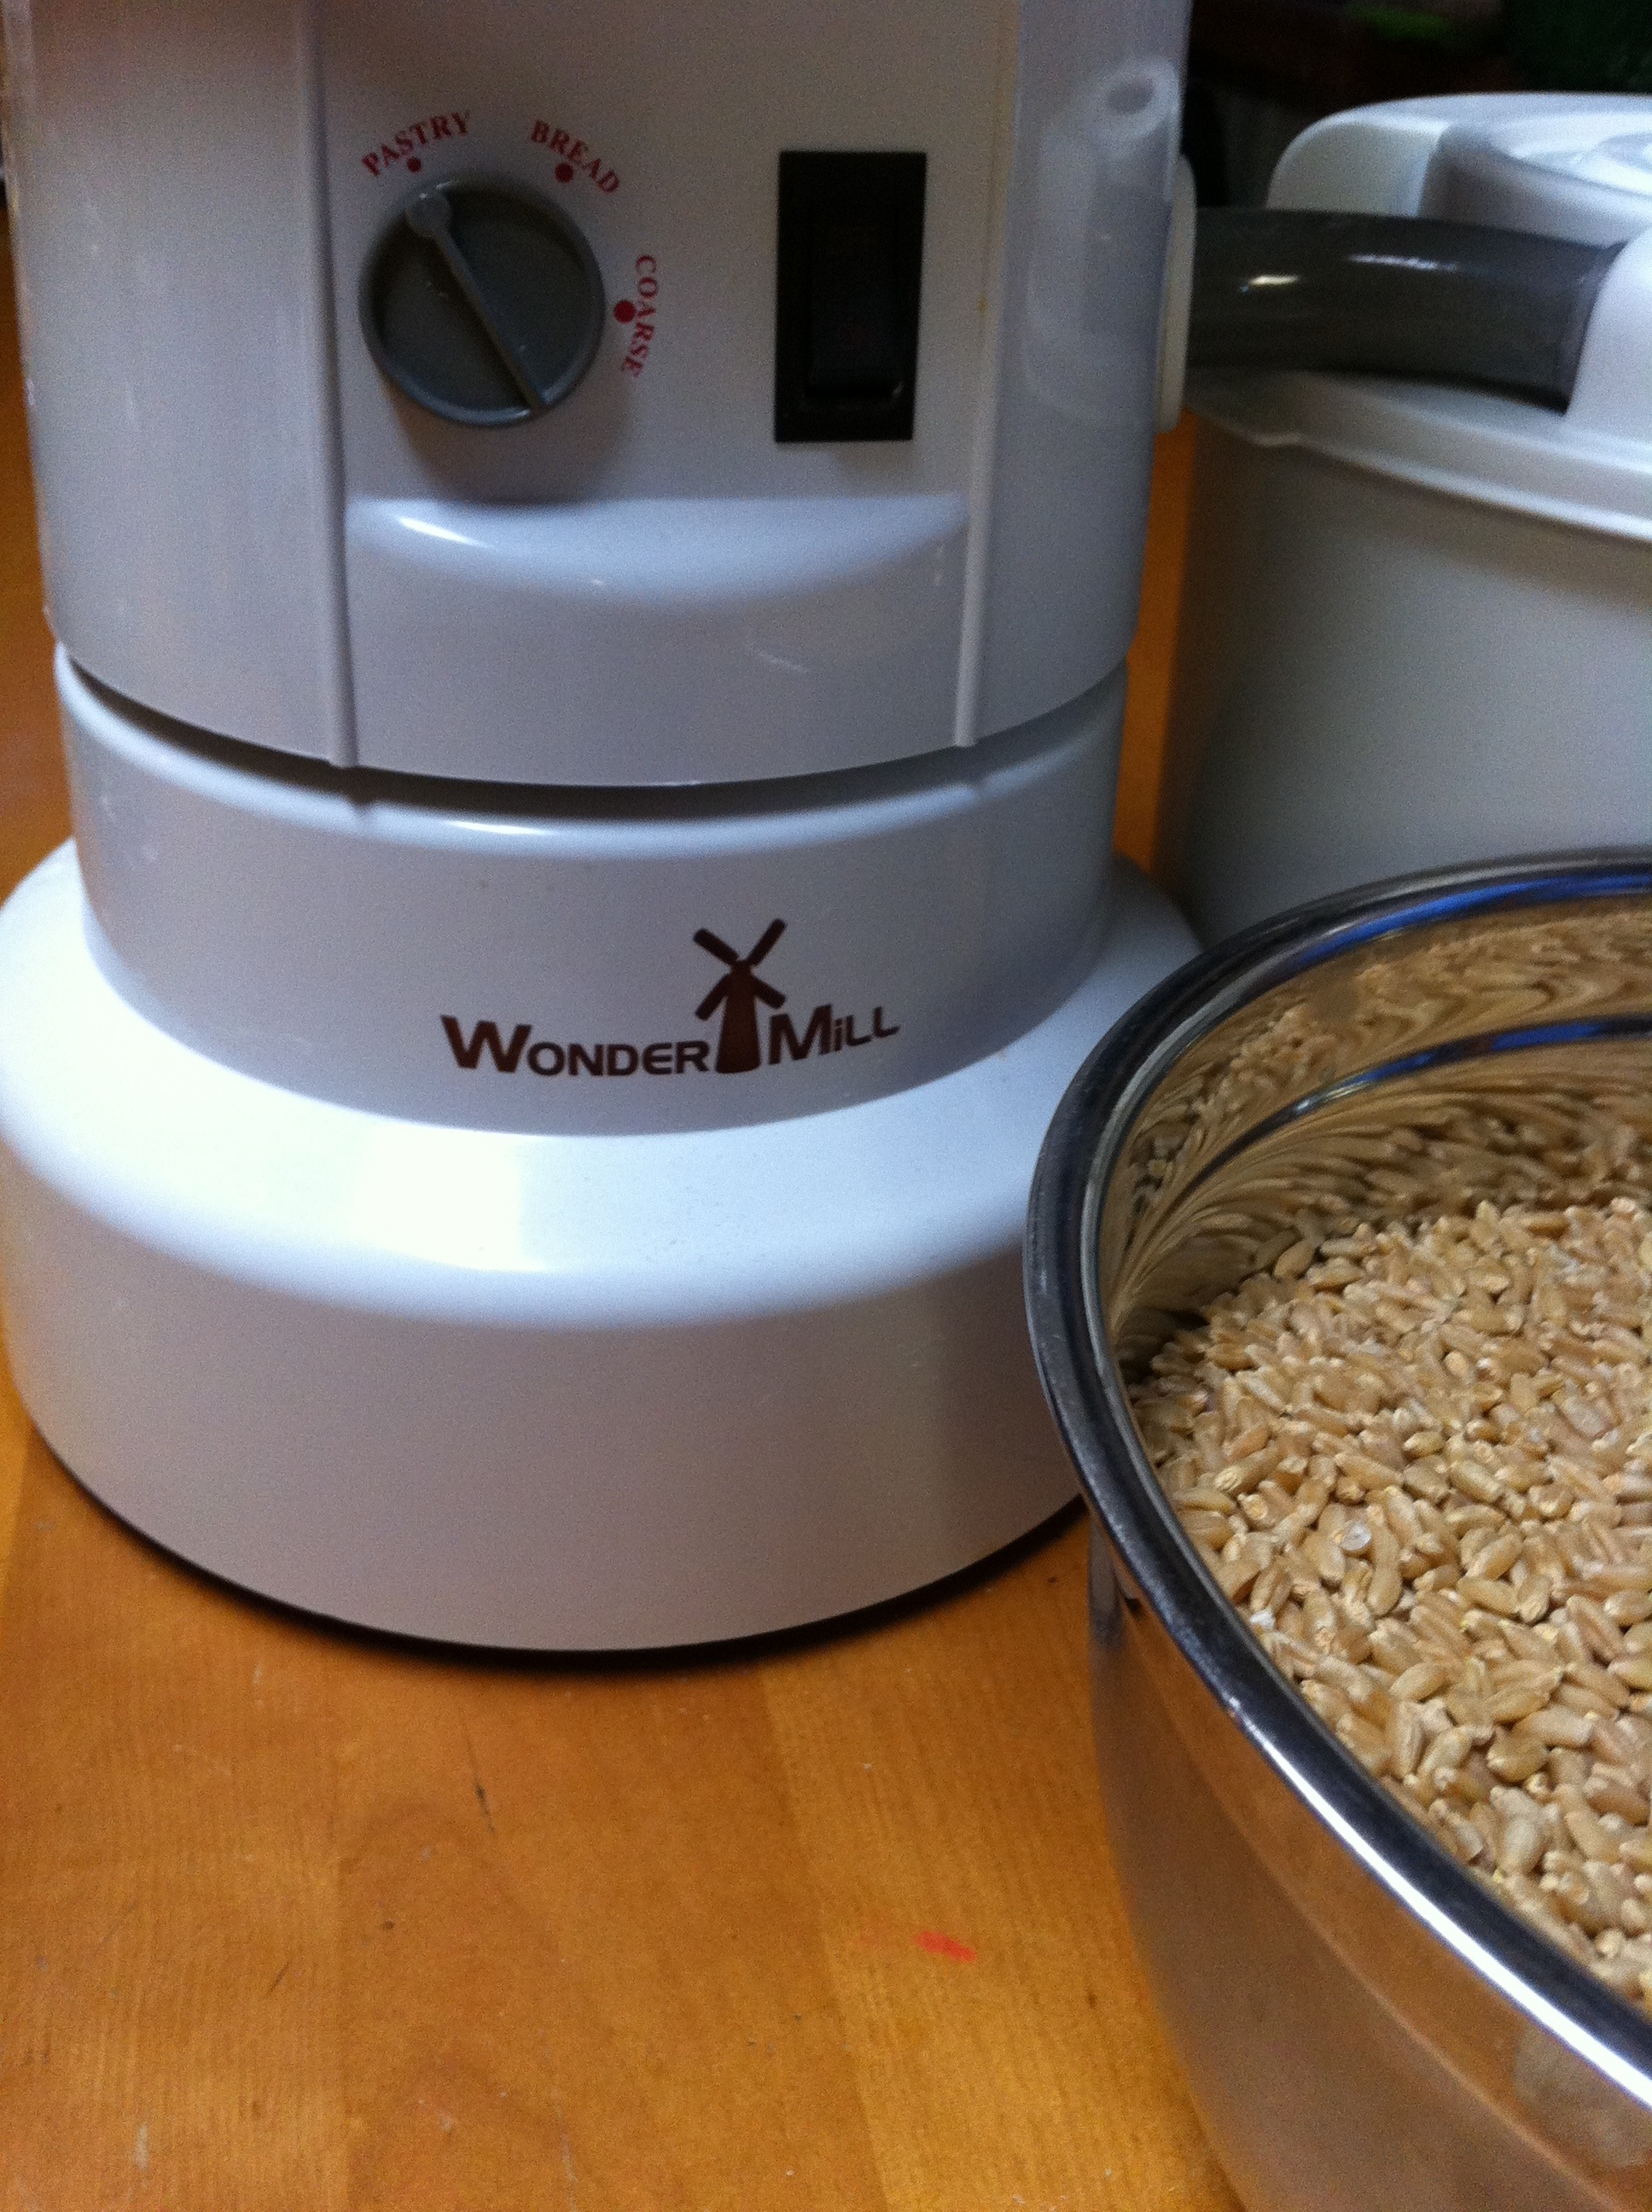
I make my whole wheat breads with freshly ground whole wheat white flour using my Wonder Mill Grain Mill. In my opinion, there is really no comparison with the end product of my baked goods using the freshly ground flour. The taste, texture and lightness of this bread is amazing. It isn’t too dense, like many whole grain products can be. Of course, this can be a result of technique and recipe as well. I have had good results every time with this recipe. So, without further ramblings from me…read on and happy baking!
Honey Wheat Roll/Bread Recipe:
5 cups whole wheat white flour {about…this amount can change a little depending on temperature/humidity in the air/time of year, etc.}
3 T vital wheat gluten {This makes a lighter, softer, chewier whole wheat loaf}
1 1/2 t salt
1 T yeast
1/3 c oil {I used olive oil}
1/3 c honey
2 1/2 c warm water
I start off by grinding my hard white wheat berries in my Wonder Mill. I grind it on “Pastry” setting and fill the hopper full with 8 cups of wheat berries. This makes about 12 cups of flour.
I also might add that I like using the freshly ground flour when making bread because the flour is warm after the milling process. This makes for a dough that rises a little easier, in my opinion. I store my unused flour in the freezer to keep it fresh, and would recommend this to others as well. You don’t have to do this, but if you do store it in the freezer, I would recommend bringing the flour to room temperature before using it at least.
Start by adding the warm water to your bowl that you will mix in. {I have a Bosch mixer that takes care of the kneading process for me, but this can be done by hand as well…it just takes longer. I honestly don’t know if I would bake as much if I had to knead everything by hand!}
Add honey to water and allow to dissolve. Sprinkle yeast on top and allow to “proof” {where the yeast gets activated…nice and frothy/bubbly}.

Once this proofing of the yeast has happened add oil, salt and gluten and give a little mix.

Sprinkle in a few cups of the whole wheat flour and start mixing/kneading.

Sprinkle remaining flour in a little bit at a time, mixing in between, until dough just starts to pull away from sides of bowl.

I like my finger to just barely stick to the dough when I touch it.

Knead with mixer about 8 minutes or 10-15 minutes if kneading by hand. {If you notice it is sticking like crazy to the sides of the bowl as mixing commences, go ahead and sprinkle a little bit more in at a time until it pulls away, but isn’t too dense.}
This is what it looks like after the kneading process.

I like to prepare the bowl that I am going to let the dough rise in by running hot tap water on the outside of the bowl to warm it up. {I really don’t like putting my nice, warm, rising dough in cold bowls!}

After kneading is done, grease that large {now warm} mixing bowl.

Transfer ball of dough to mixing bowl, grease/oil top of dough and then cover with plastic wrap and a dish towel. {Another tip…I find that oiling my hands first helps to keep the dough from sticking to them.}

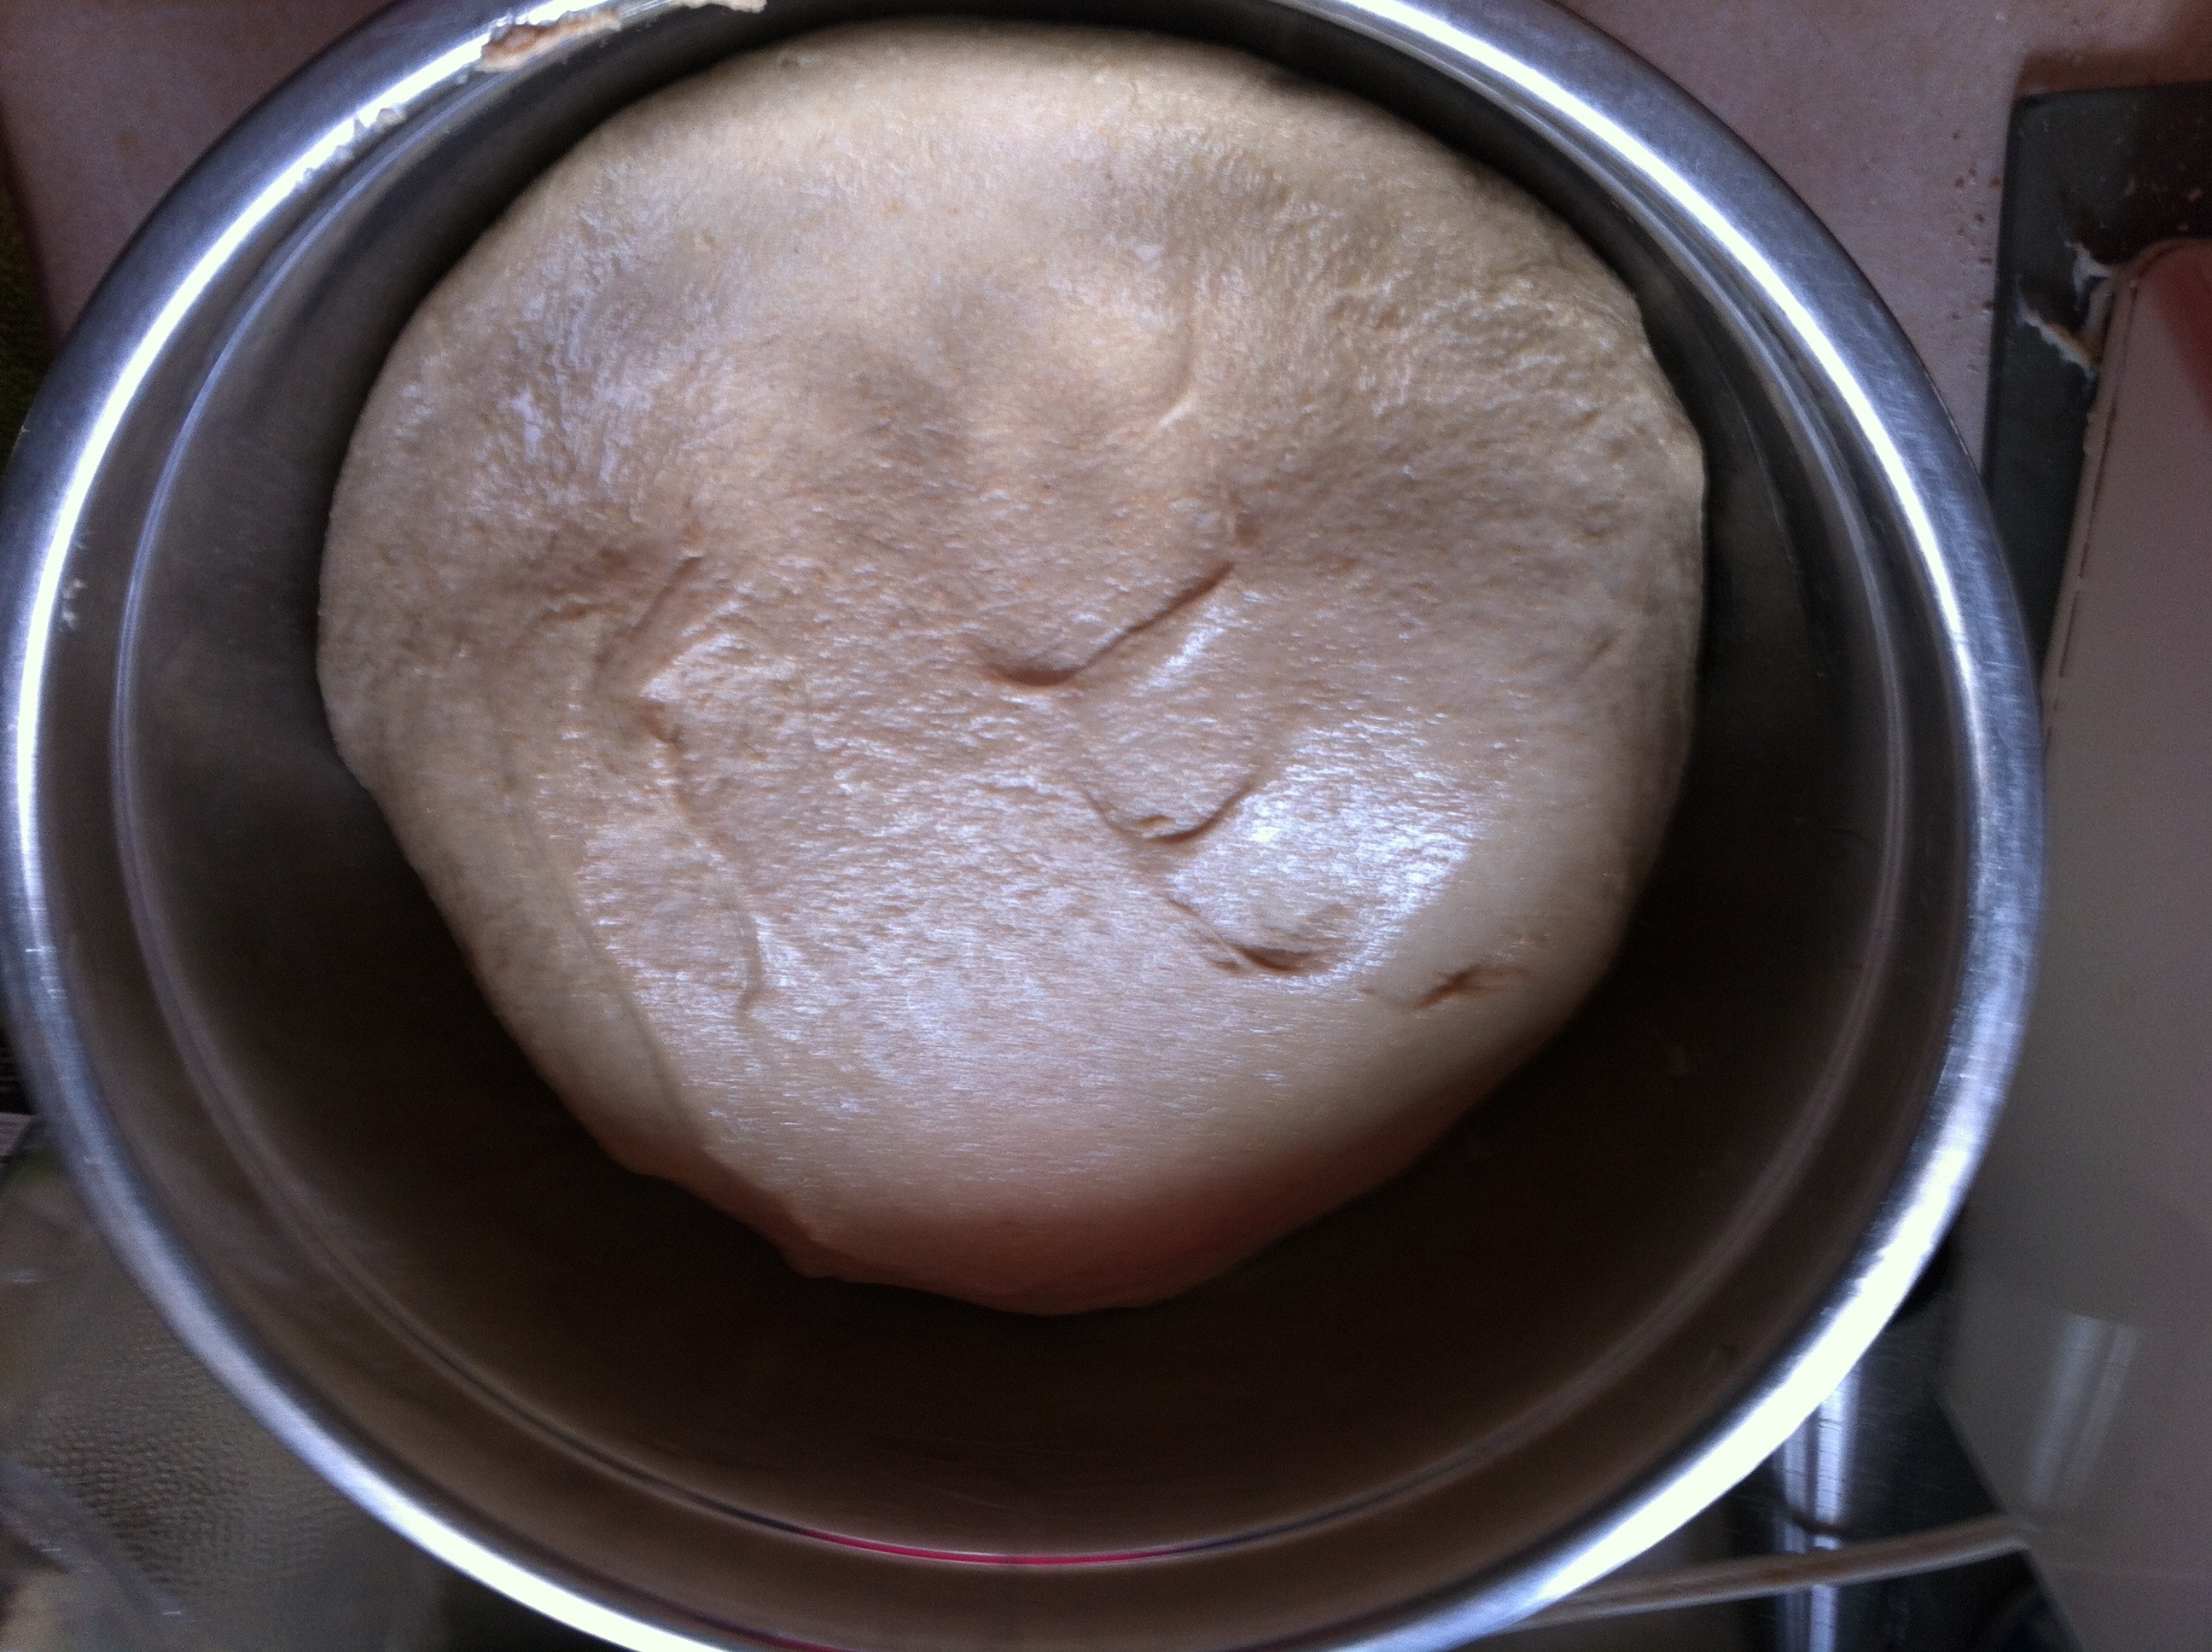

Allow to rise in a warm place until it has doubled in size.

{I did double the recipe, so your batch might not look *quite* so big, btw…}
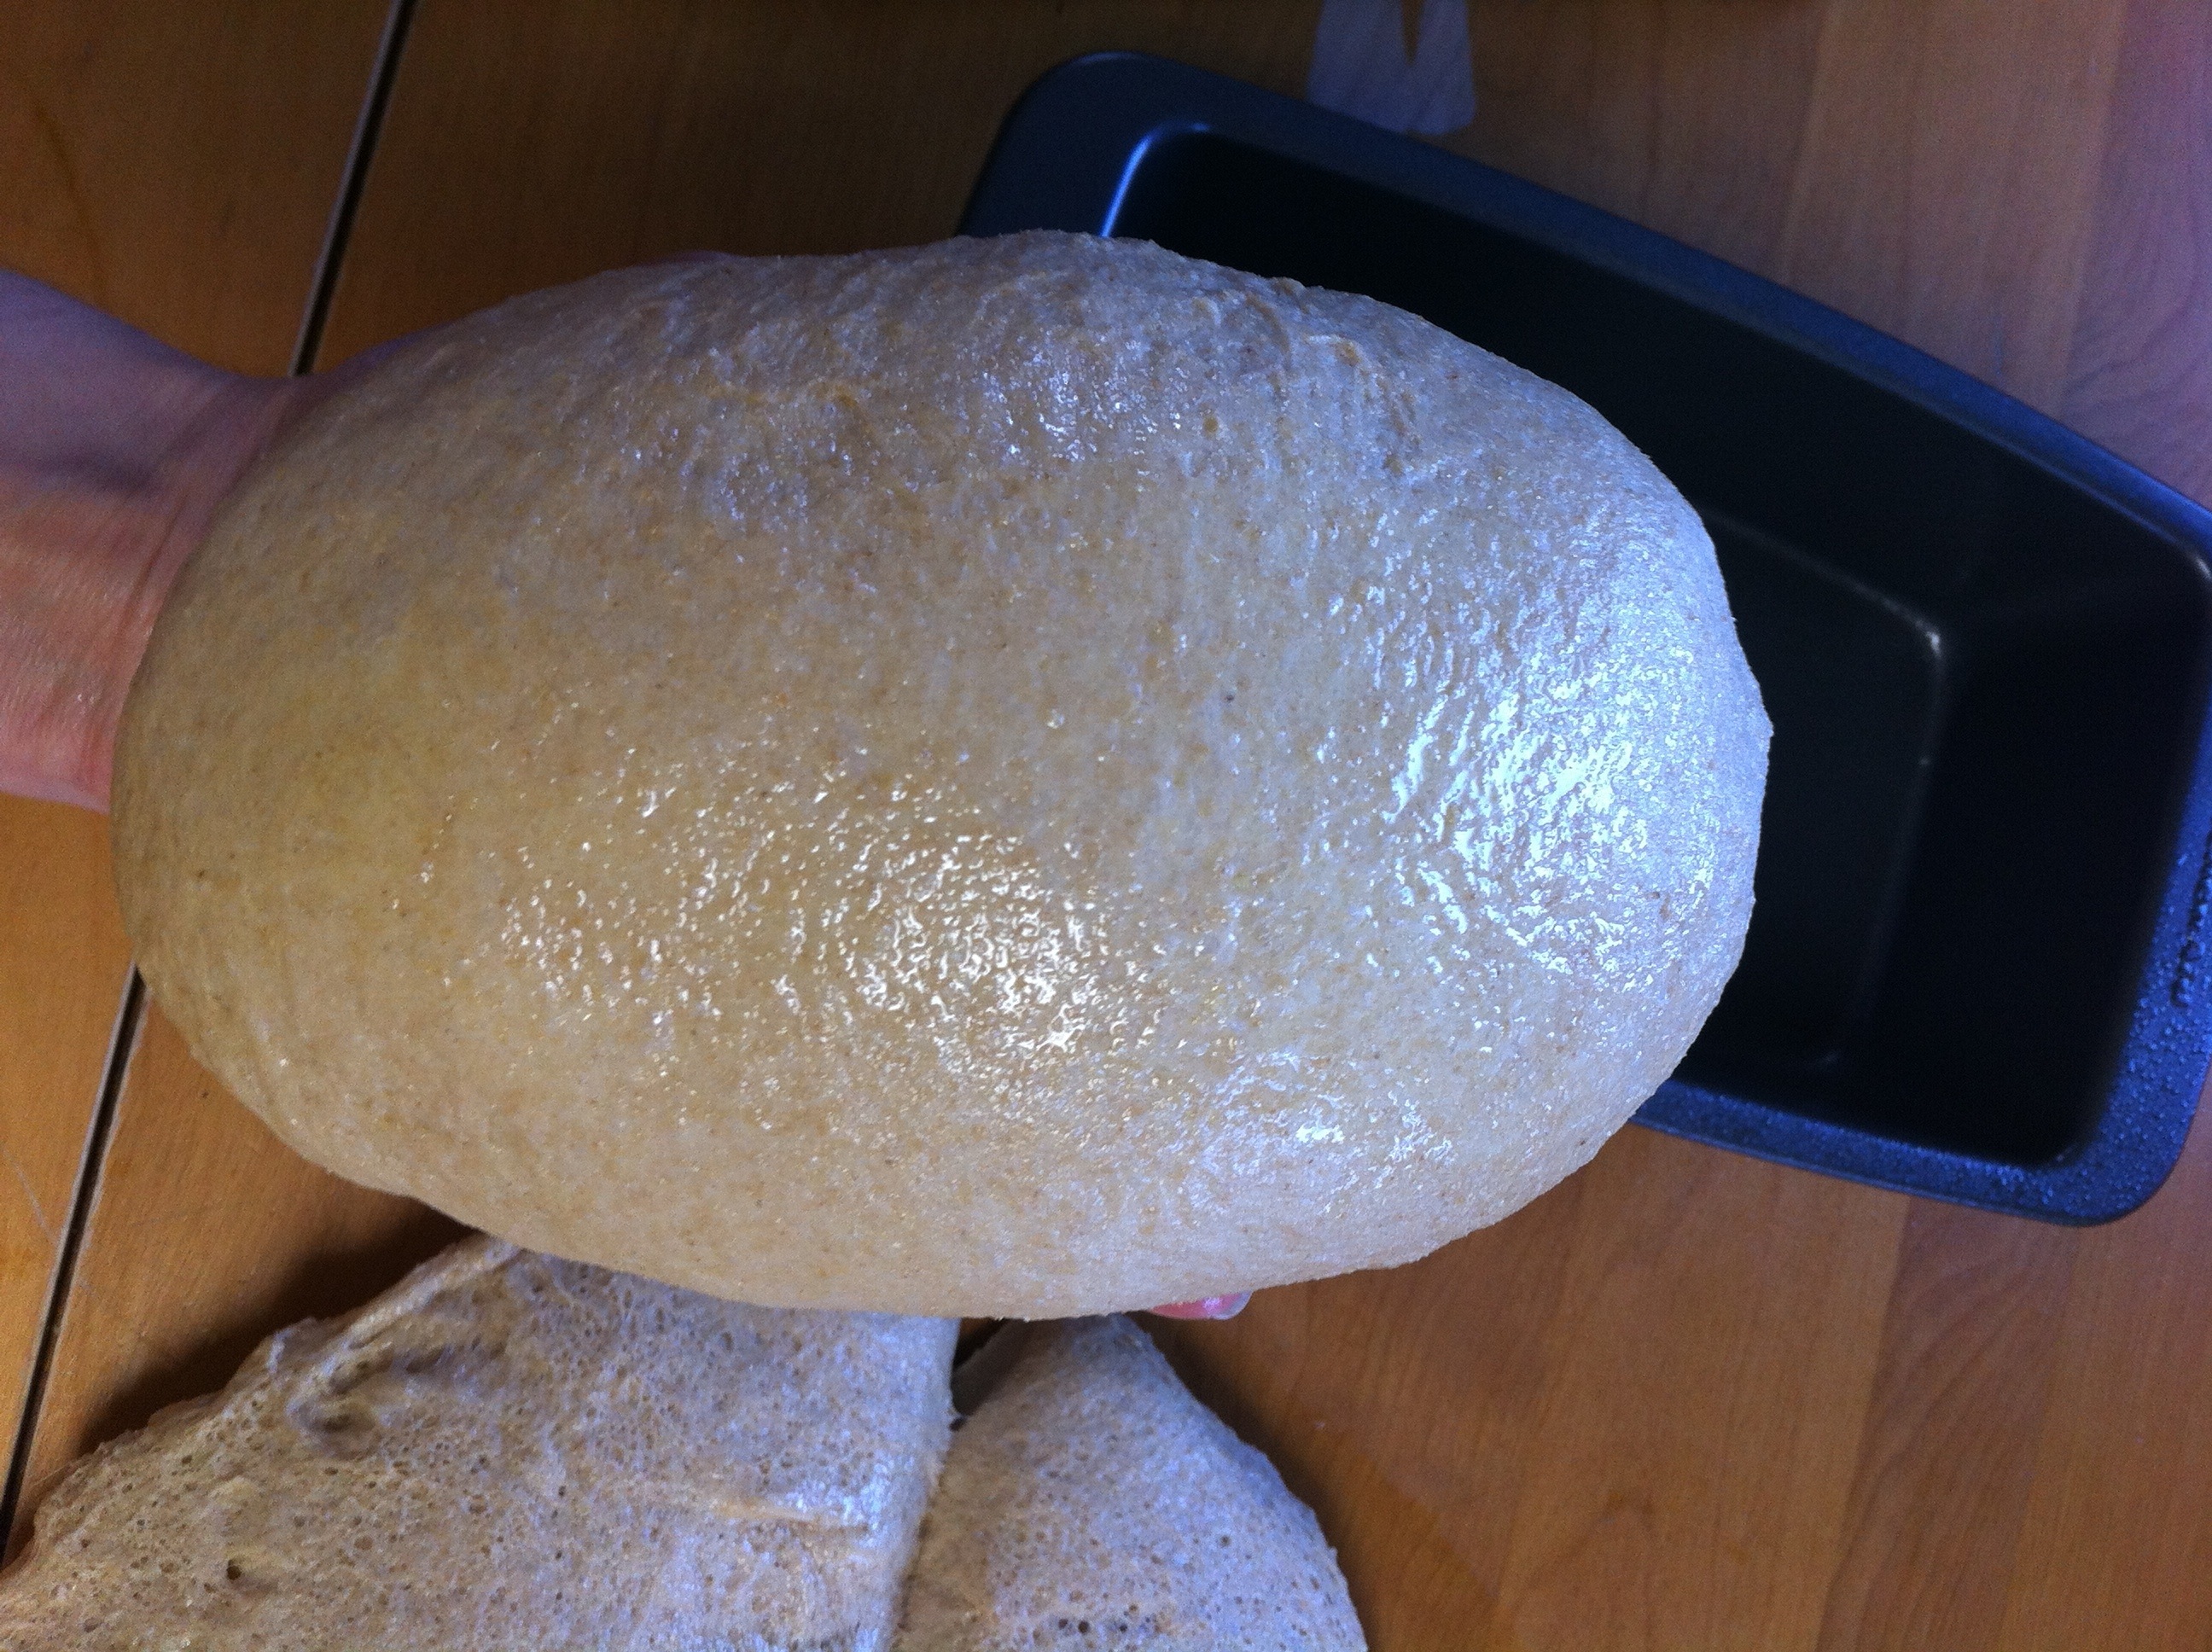
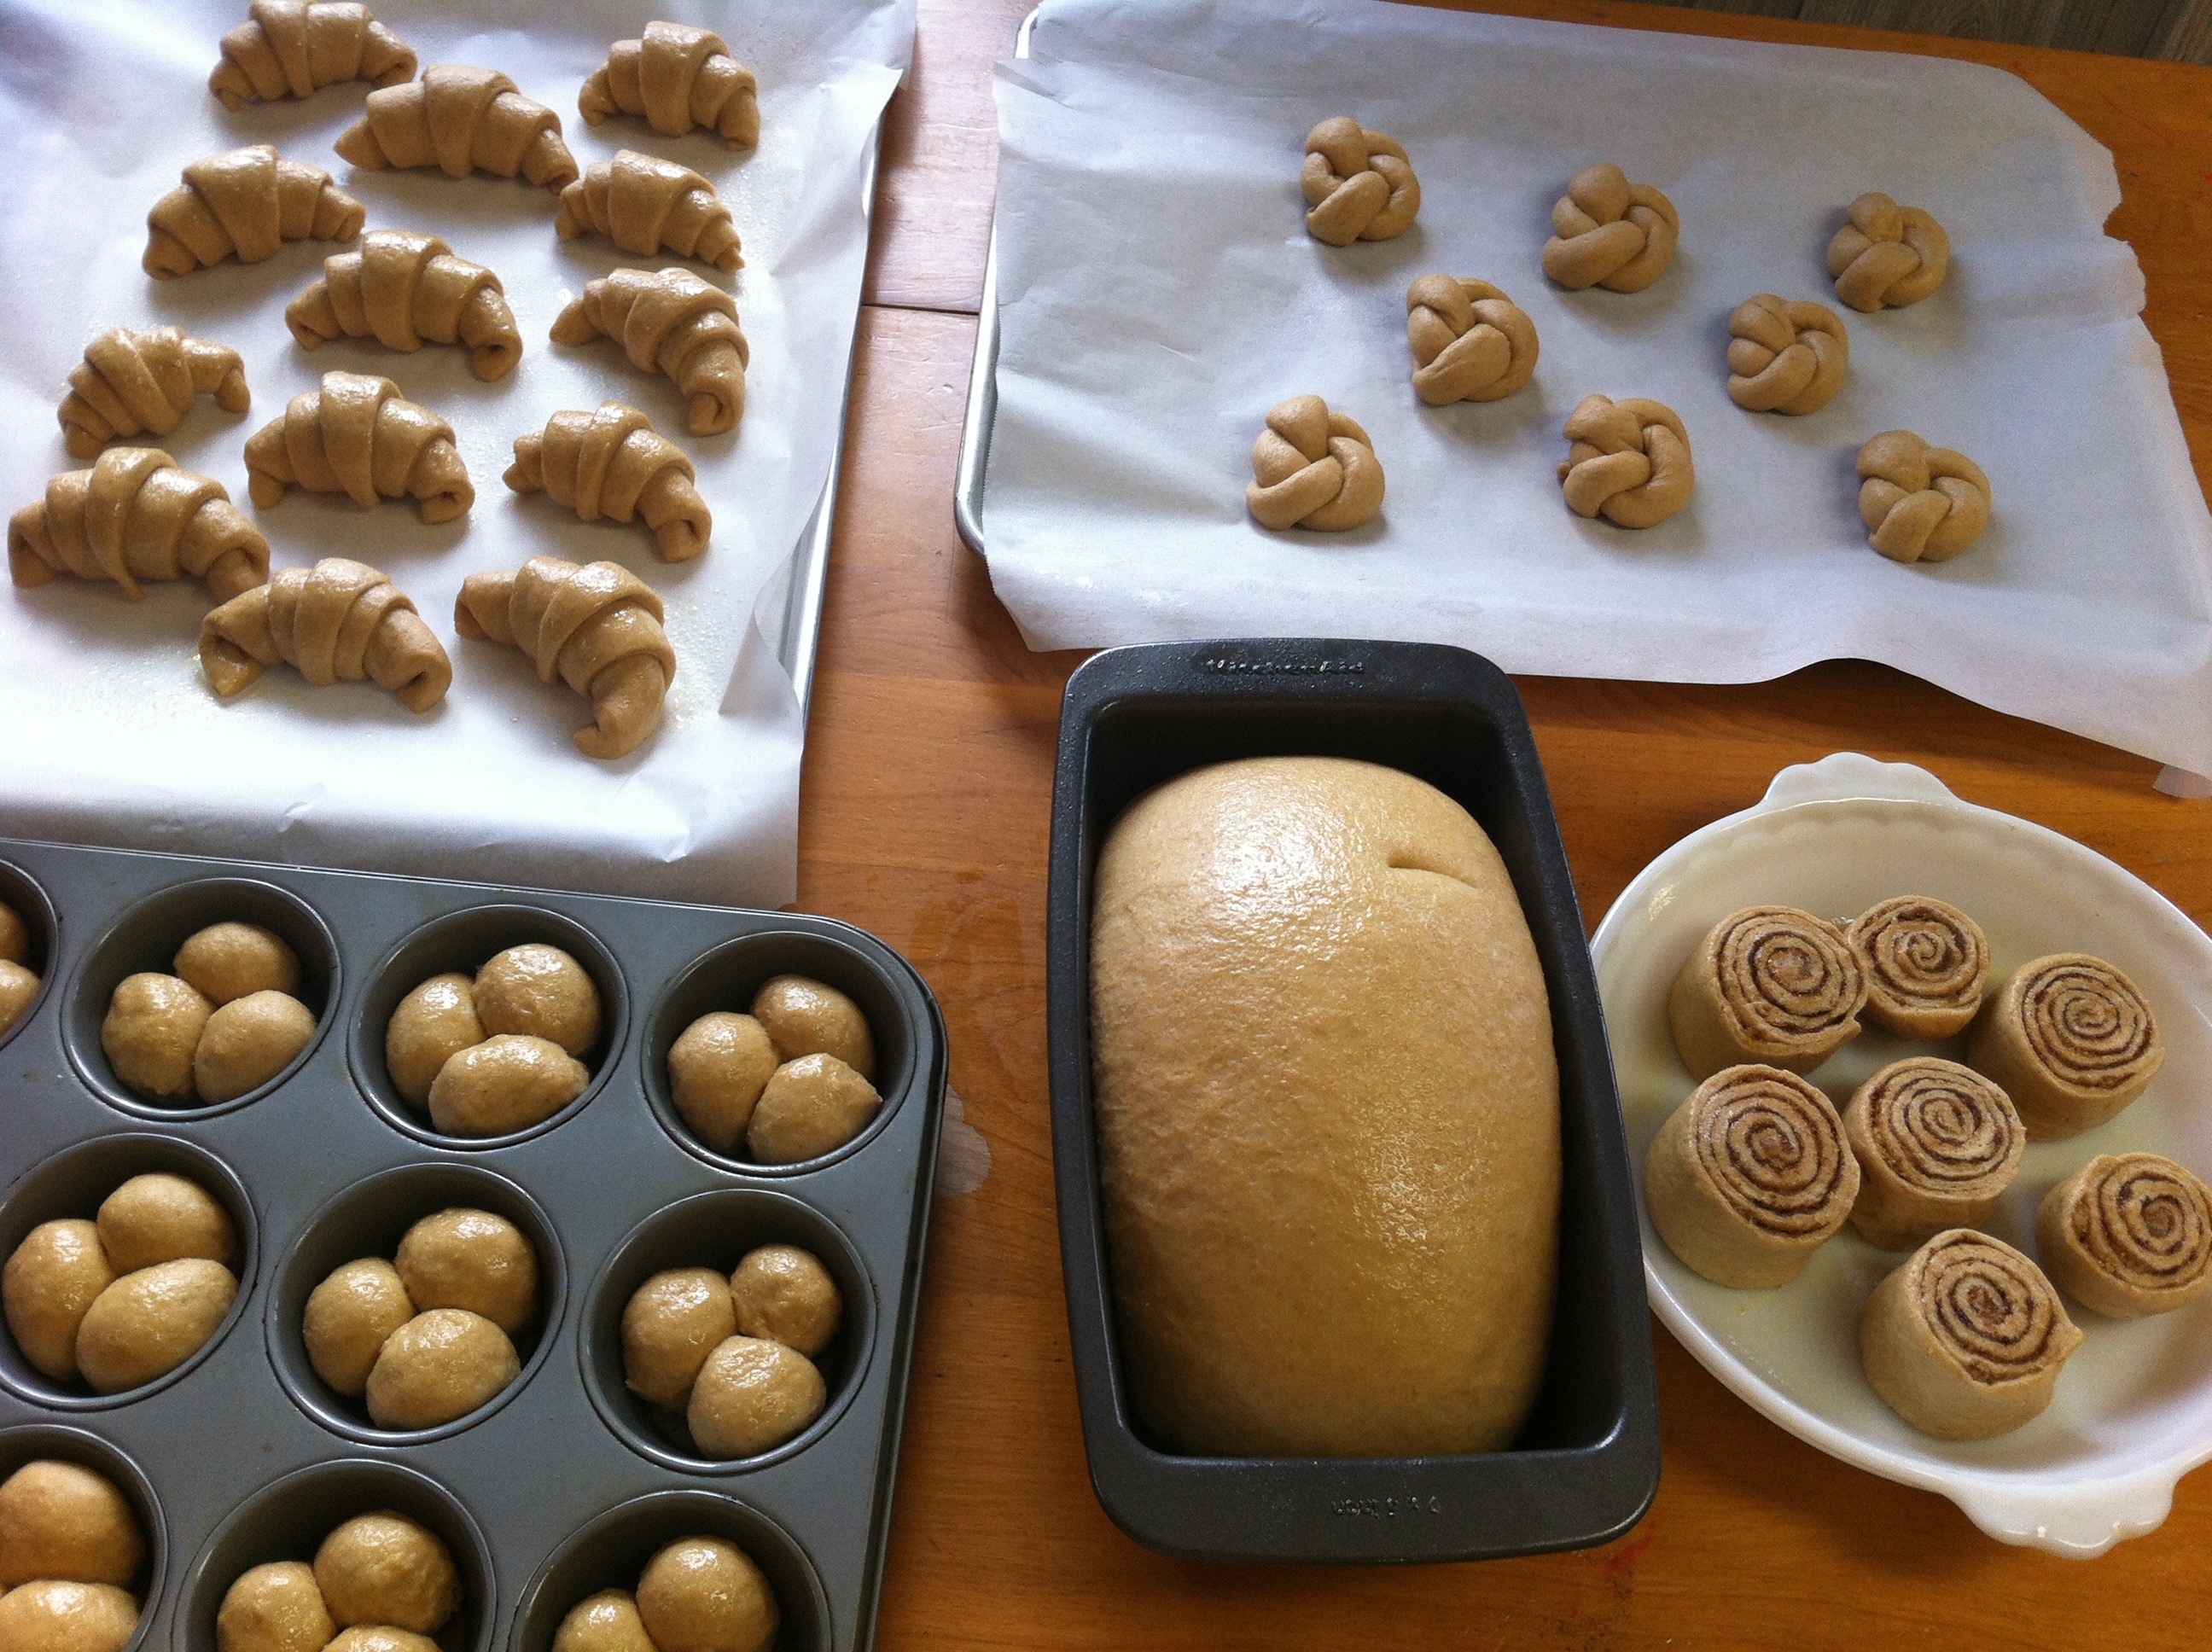
Transfer dough onto a clean work surface and divide dough appropriately, getting the big air bubbles out in the process from the first rising. This recipe makes 2 loaves of bread and about 24 rolls {depending on how big you want them}.

I will show you the different variations that I made with this batch:
1} A regular ol’ loaf of bread
Grease a bread pan. Shape dough into a nice loaf. Cover with dish towel and allow to rise in a warm place until doubled in size. Bake a in a 350 degree oven for 28-32 minutes.


2} Crescent shaped rolls
Take a hunk of dough and shape into a ball. Roll ball out pretty thin to make a large circle. Cut into triangles and roll each individual triangle into a crescent shape. Sort of “pinch” the sides together to get the ends to point towards each other. Place on parchment paper lined baking sheets {this keeps your baked goods from sticking!} and cover lightly with a dish towel. Allow to rise in a warm place until doubled in size. Bake in a 350 degree oven for 18-20 minutes {or until golden brown, or however brown you enjoy your rolls}. While still hot, top with melted butter, if desired.


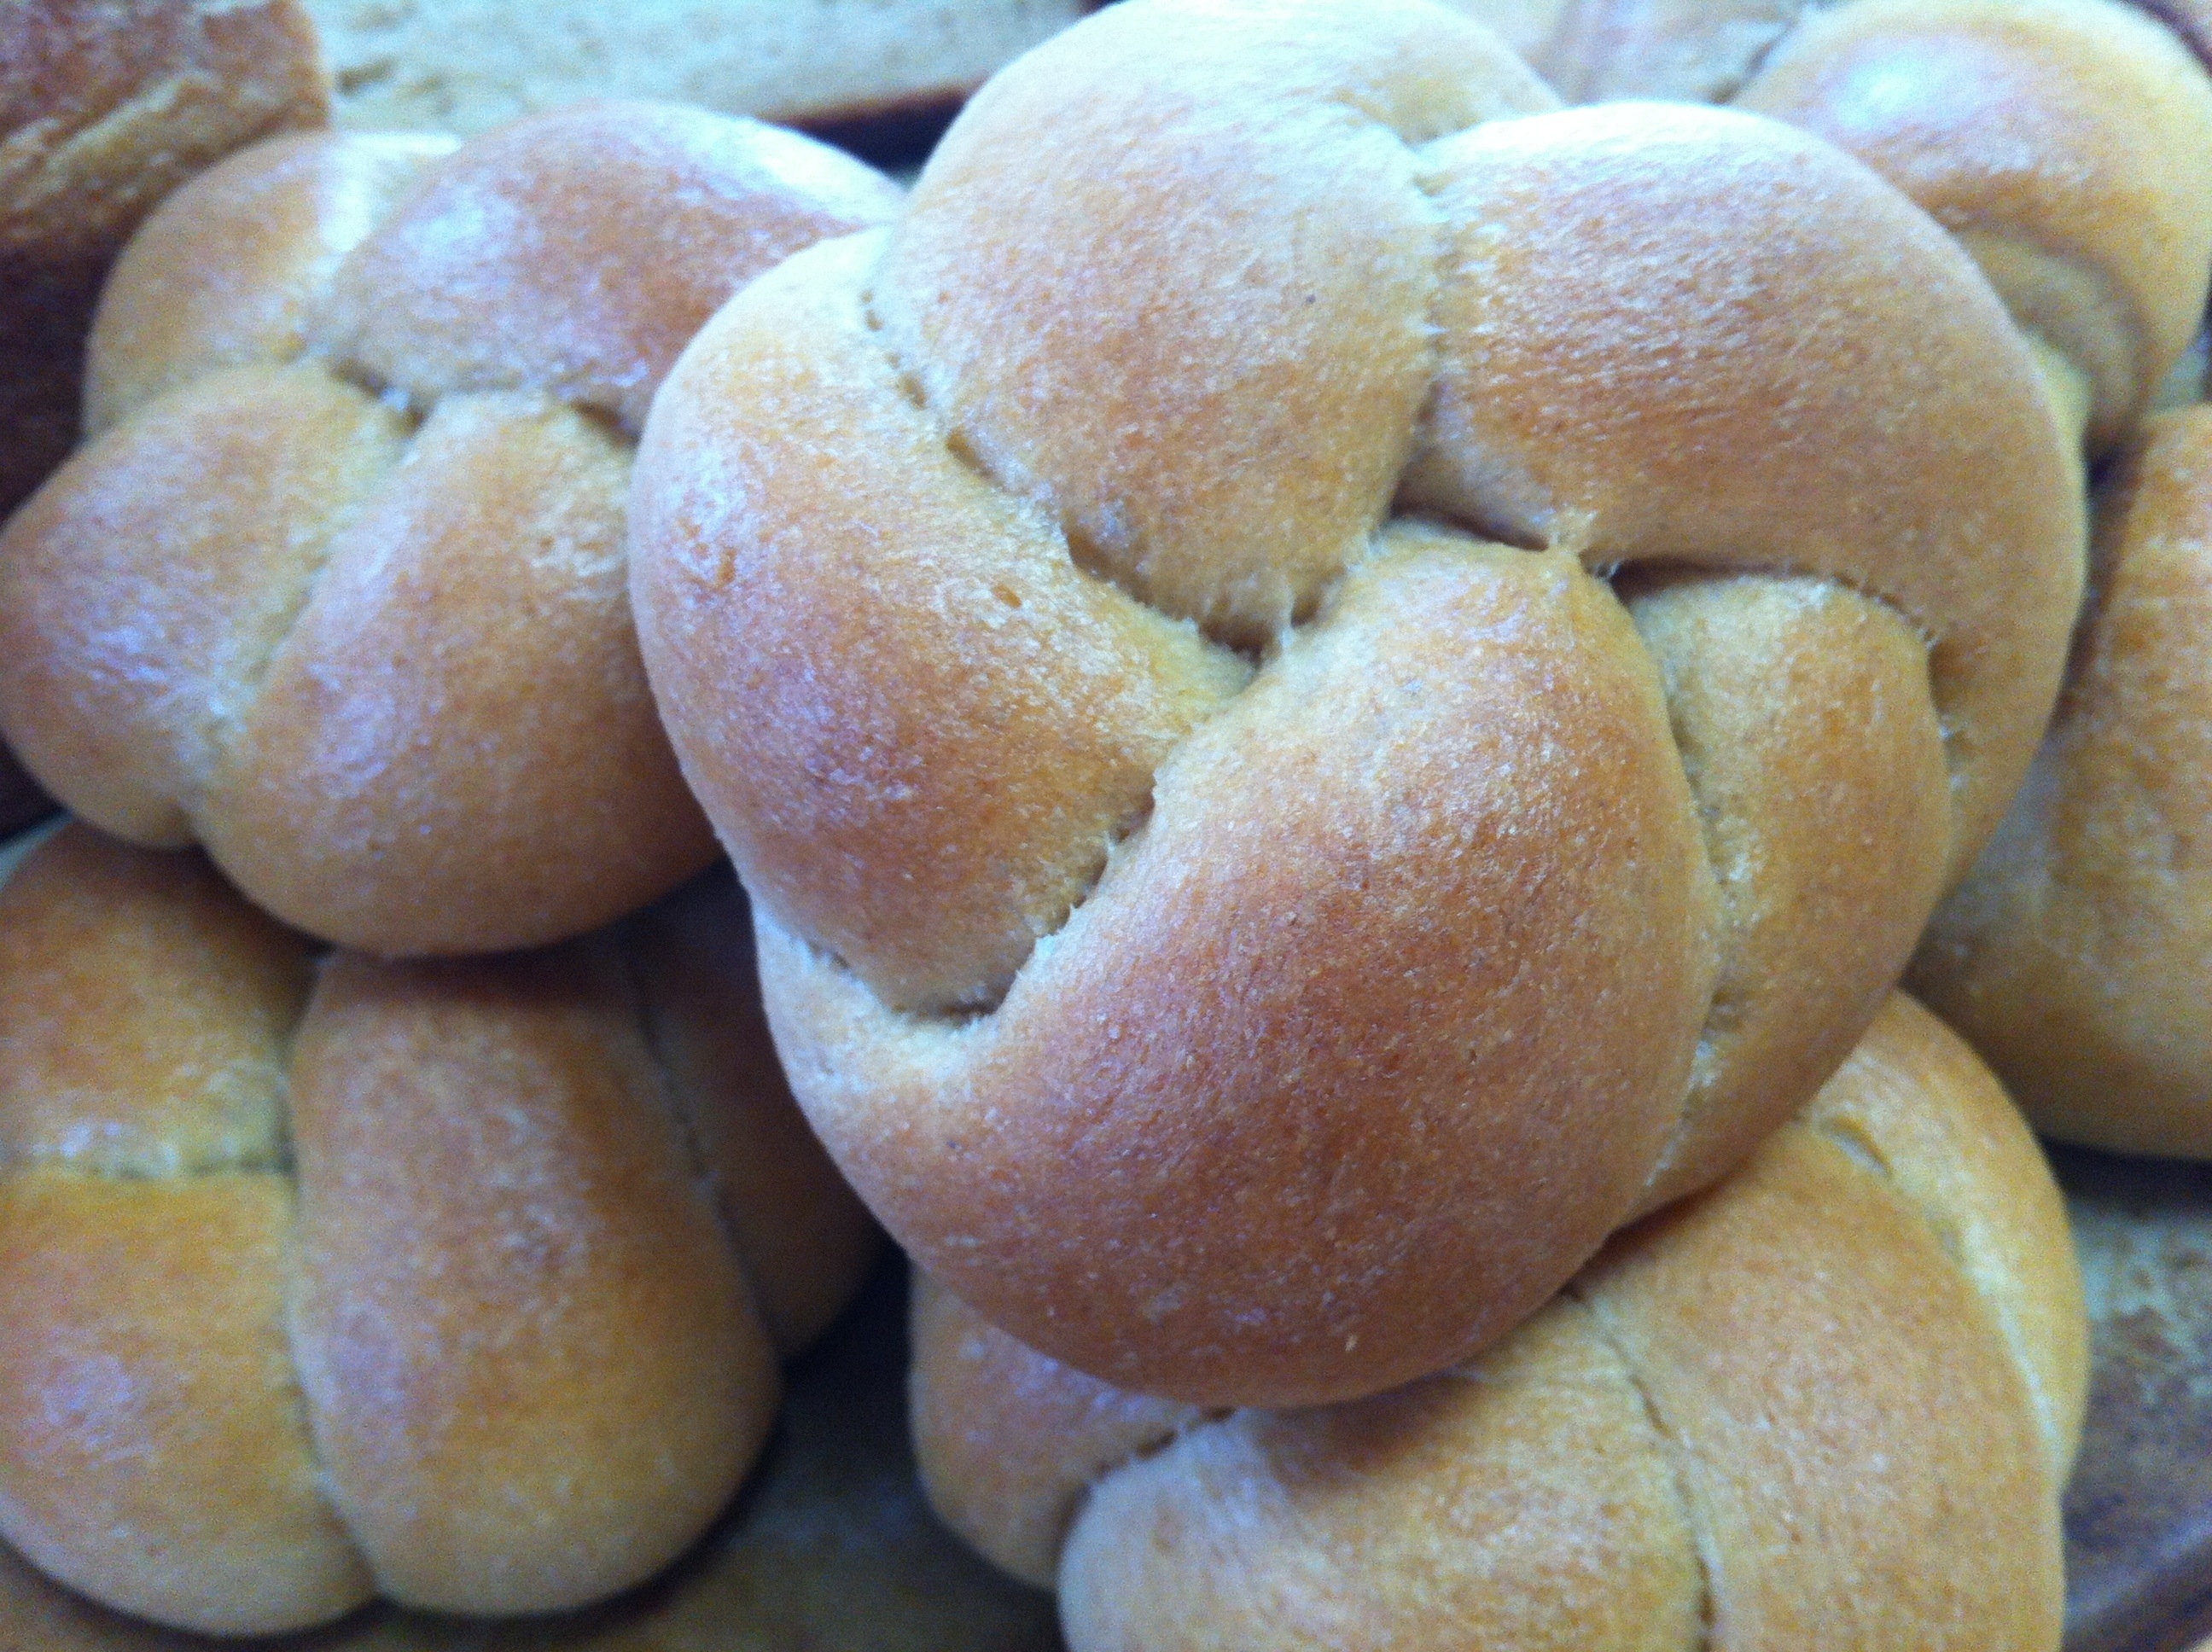
3} Rosette shaped rolls
Take a piece of divided dough and roll out so it is long and thin, like a snake.
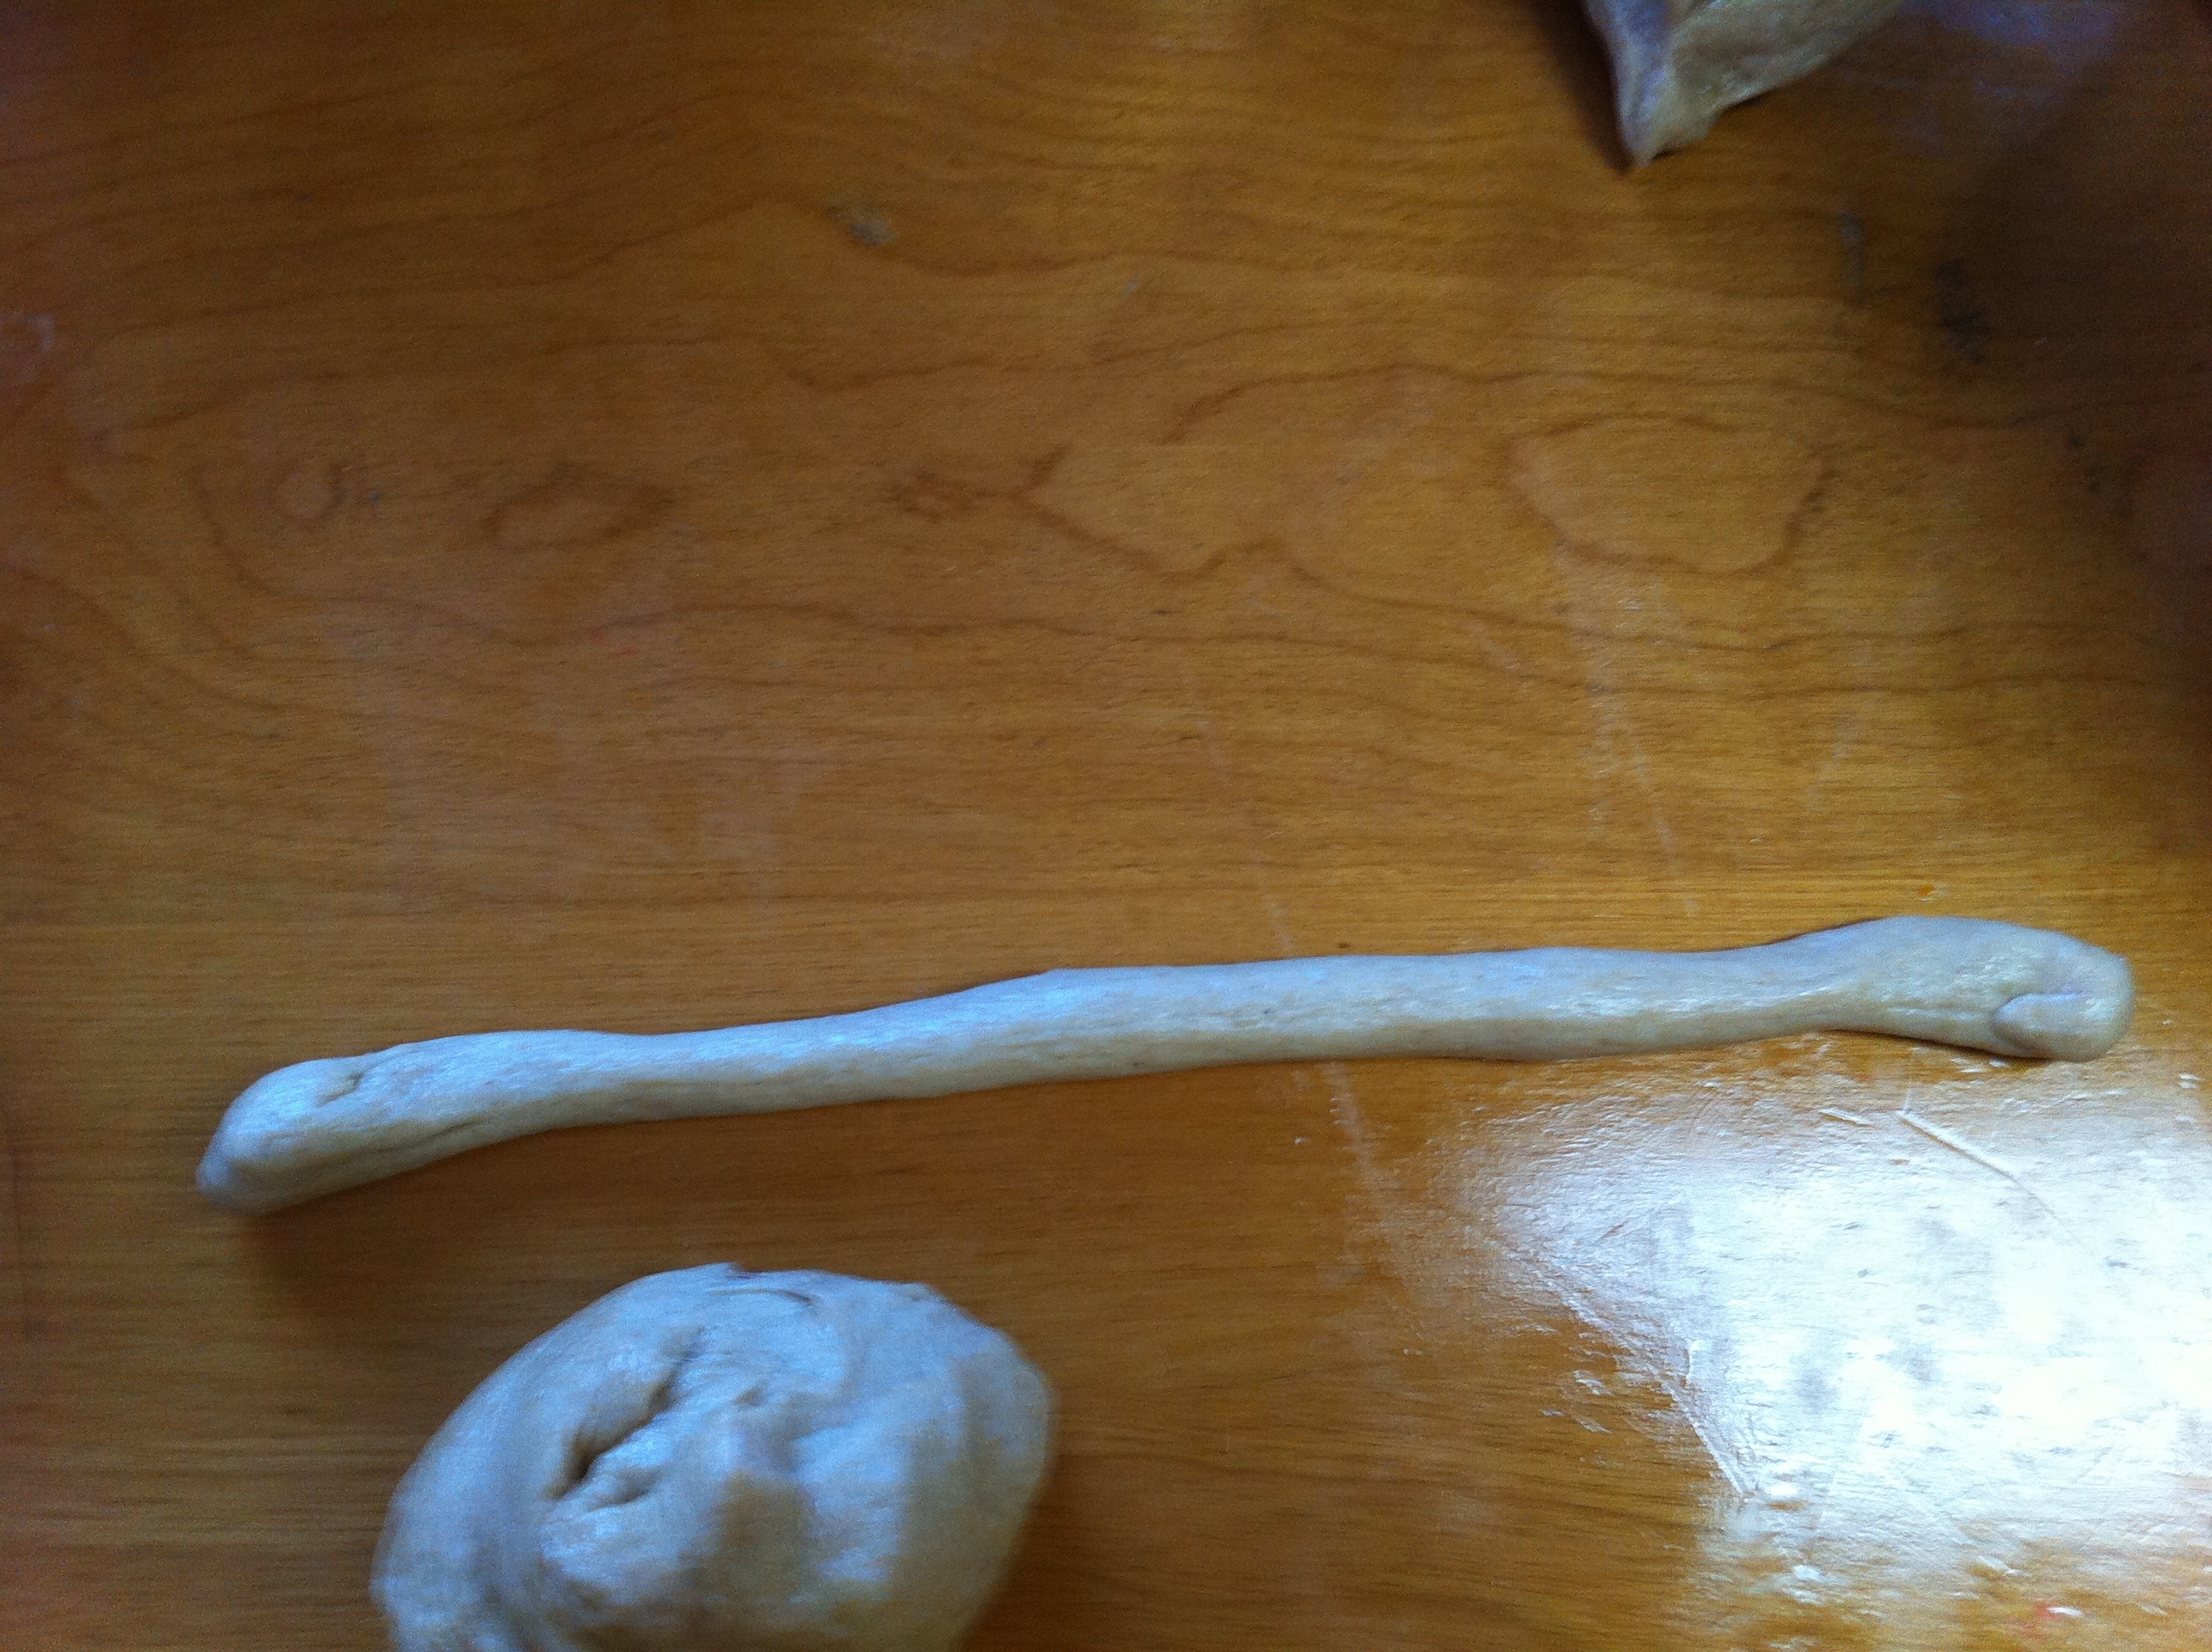
Tie in a loose knot.

Bring one end up and place end through middle of knot.

Take remaining in and tuck it underneath roll.

Place on parchment paper lined baking sheets {this keeps your baked goods from sticking!} and cover lightly with a dish towel. Allow to rise in a warm place until doubled in size. Bake in a 350 degree oven for 18-20 minutes {or until golden brown, or however brown you enjoy your rolls}. While still hot, top with melted butter, if desired.
4} Cloverleaf Rolls
Grease a muffin tin. Shape 3 small balls and place into each “muffin compartment.”
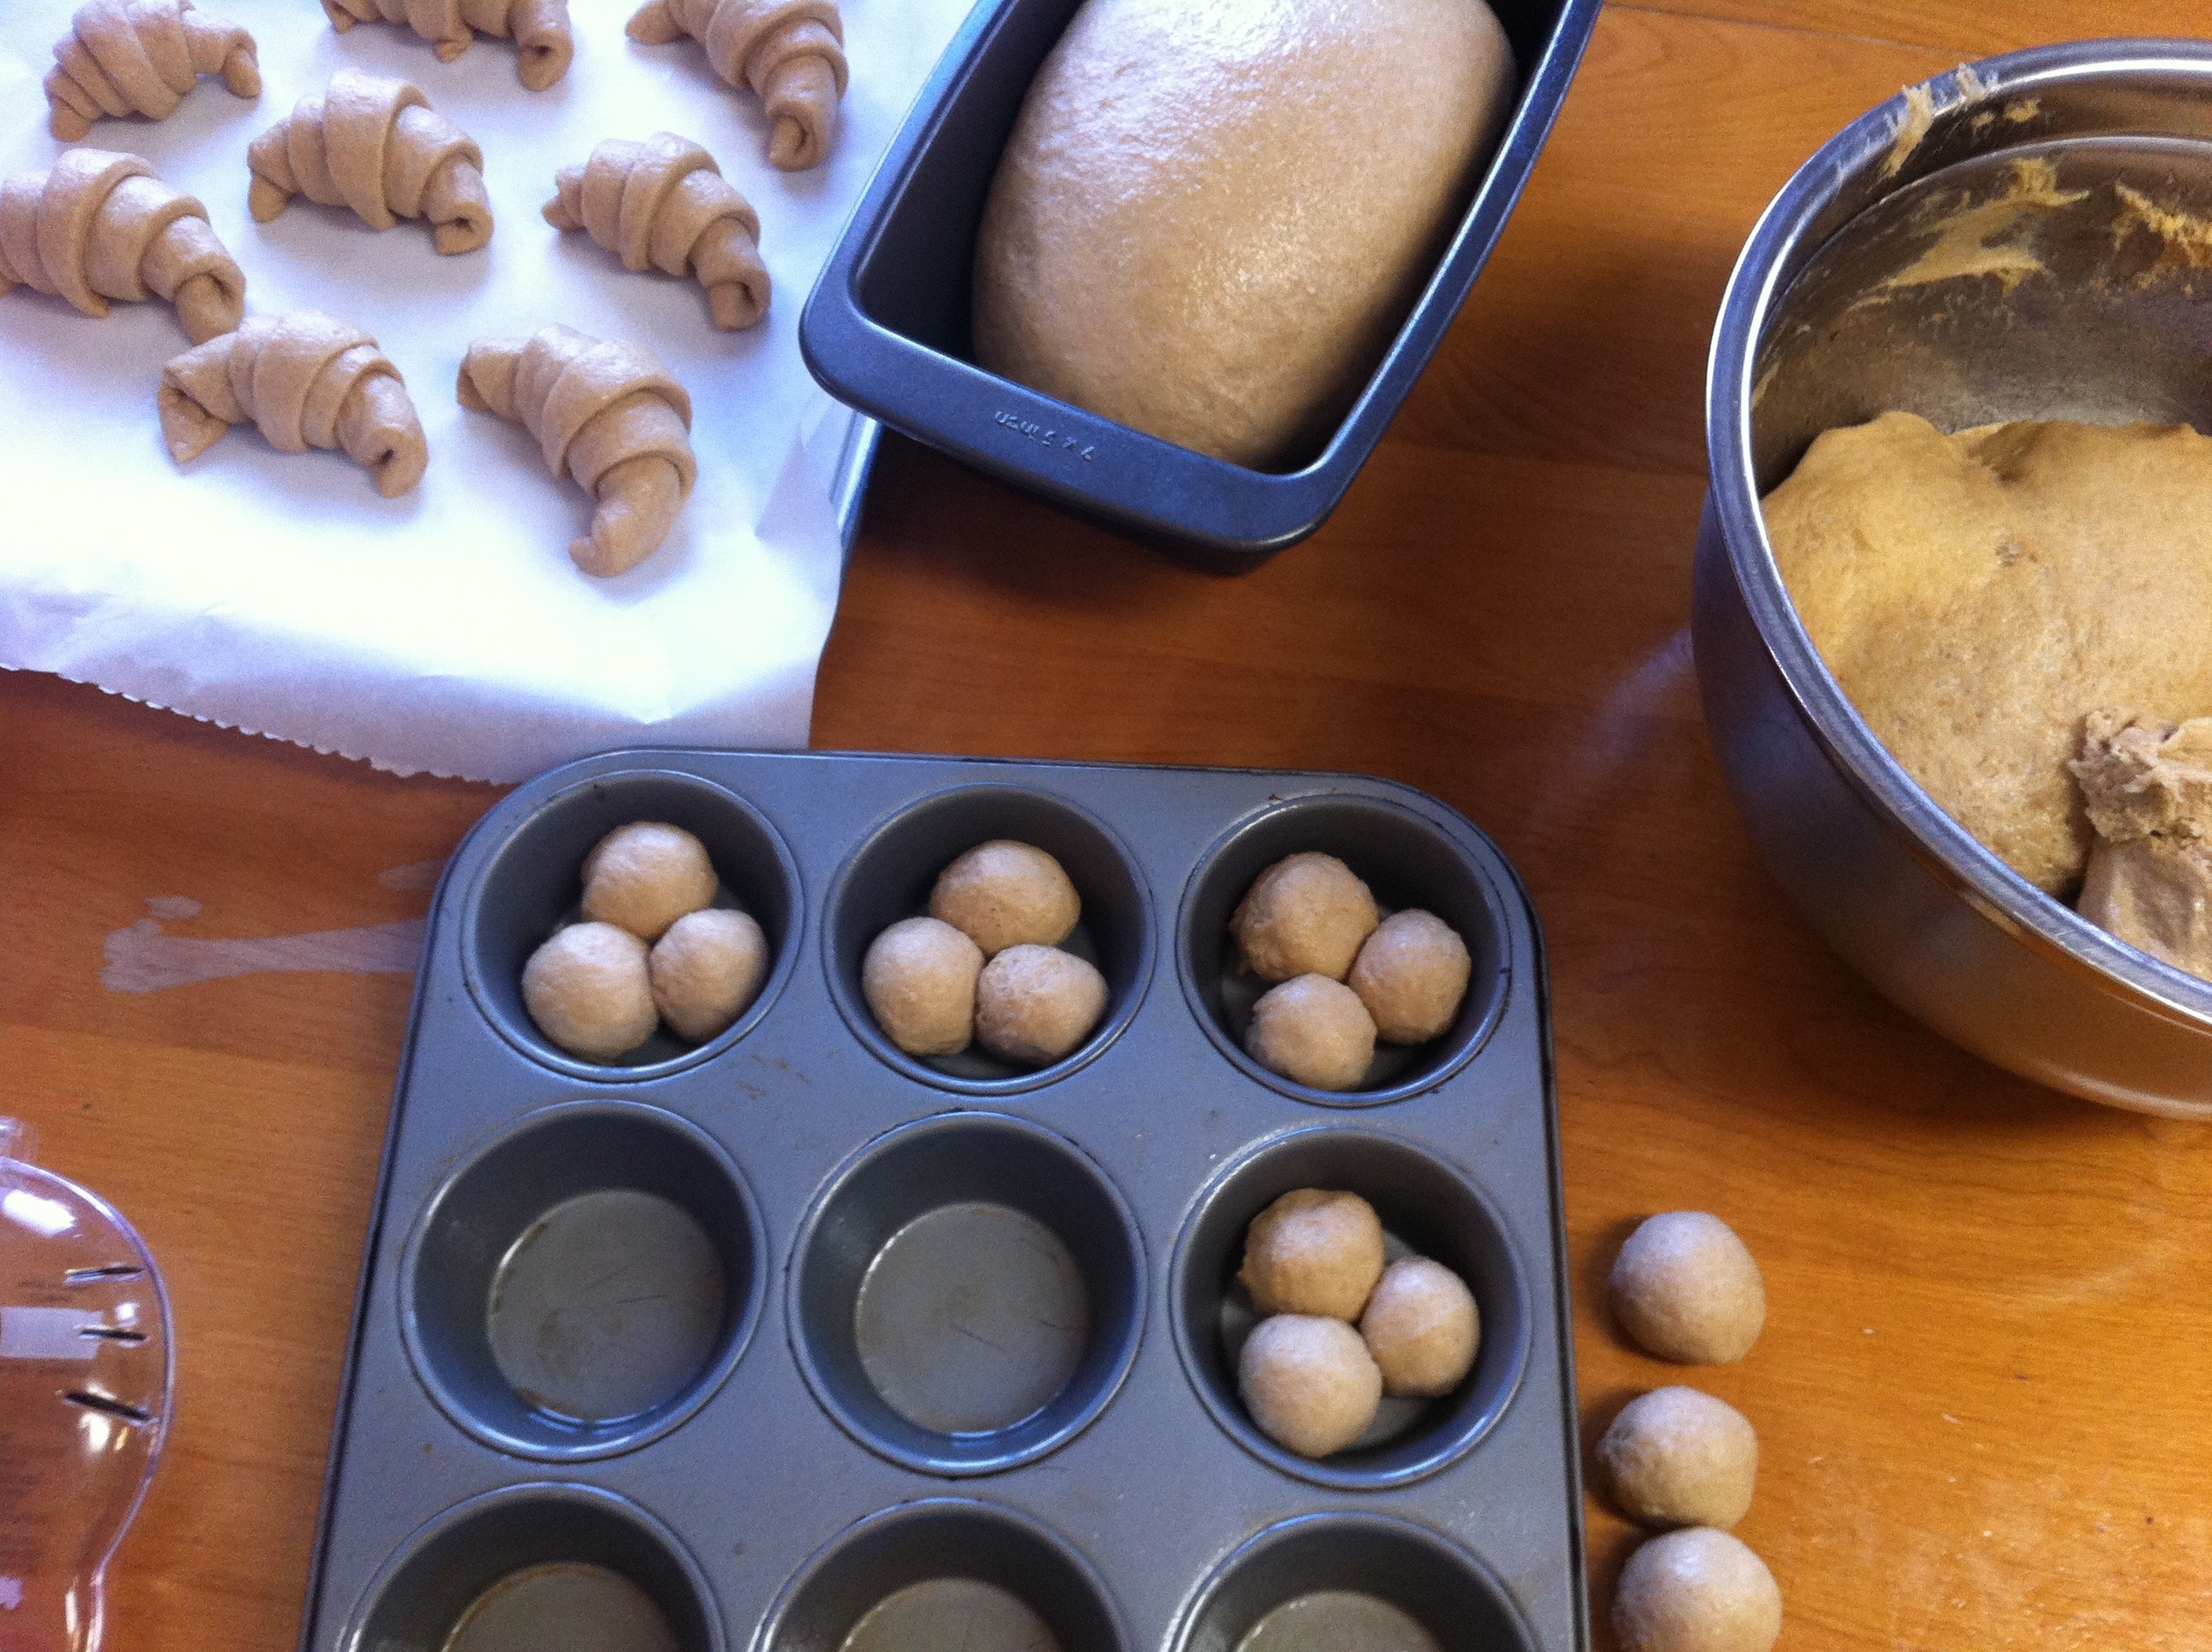
Cover lightly with a dish towel. Allow to rise in a warm place until doubled in size. Bake in a 350 degree oven for 18-20 minutes {or until golden brown, or however brown you enjoy your rolls}. While still hot, top with melted butter, if desired.

5} Last, but not lease….Cinnamon Rolls!
Roll out a nice portion of dough into a thin rectangle. Top with cinnamon roll toppings. No real measurements here. I slathered a good amount of coconut oil on top of the dough first {instead of butter because of dairy allergies in the family}. Then, took a handful of brown sugar and spread it around. Then, I sprinkled that with a good amount of cinnamon.
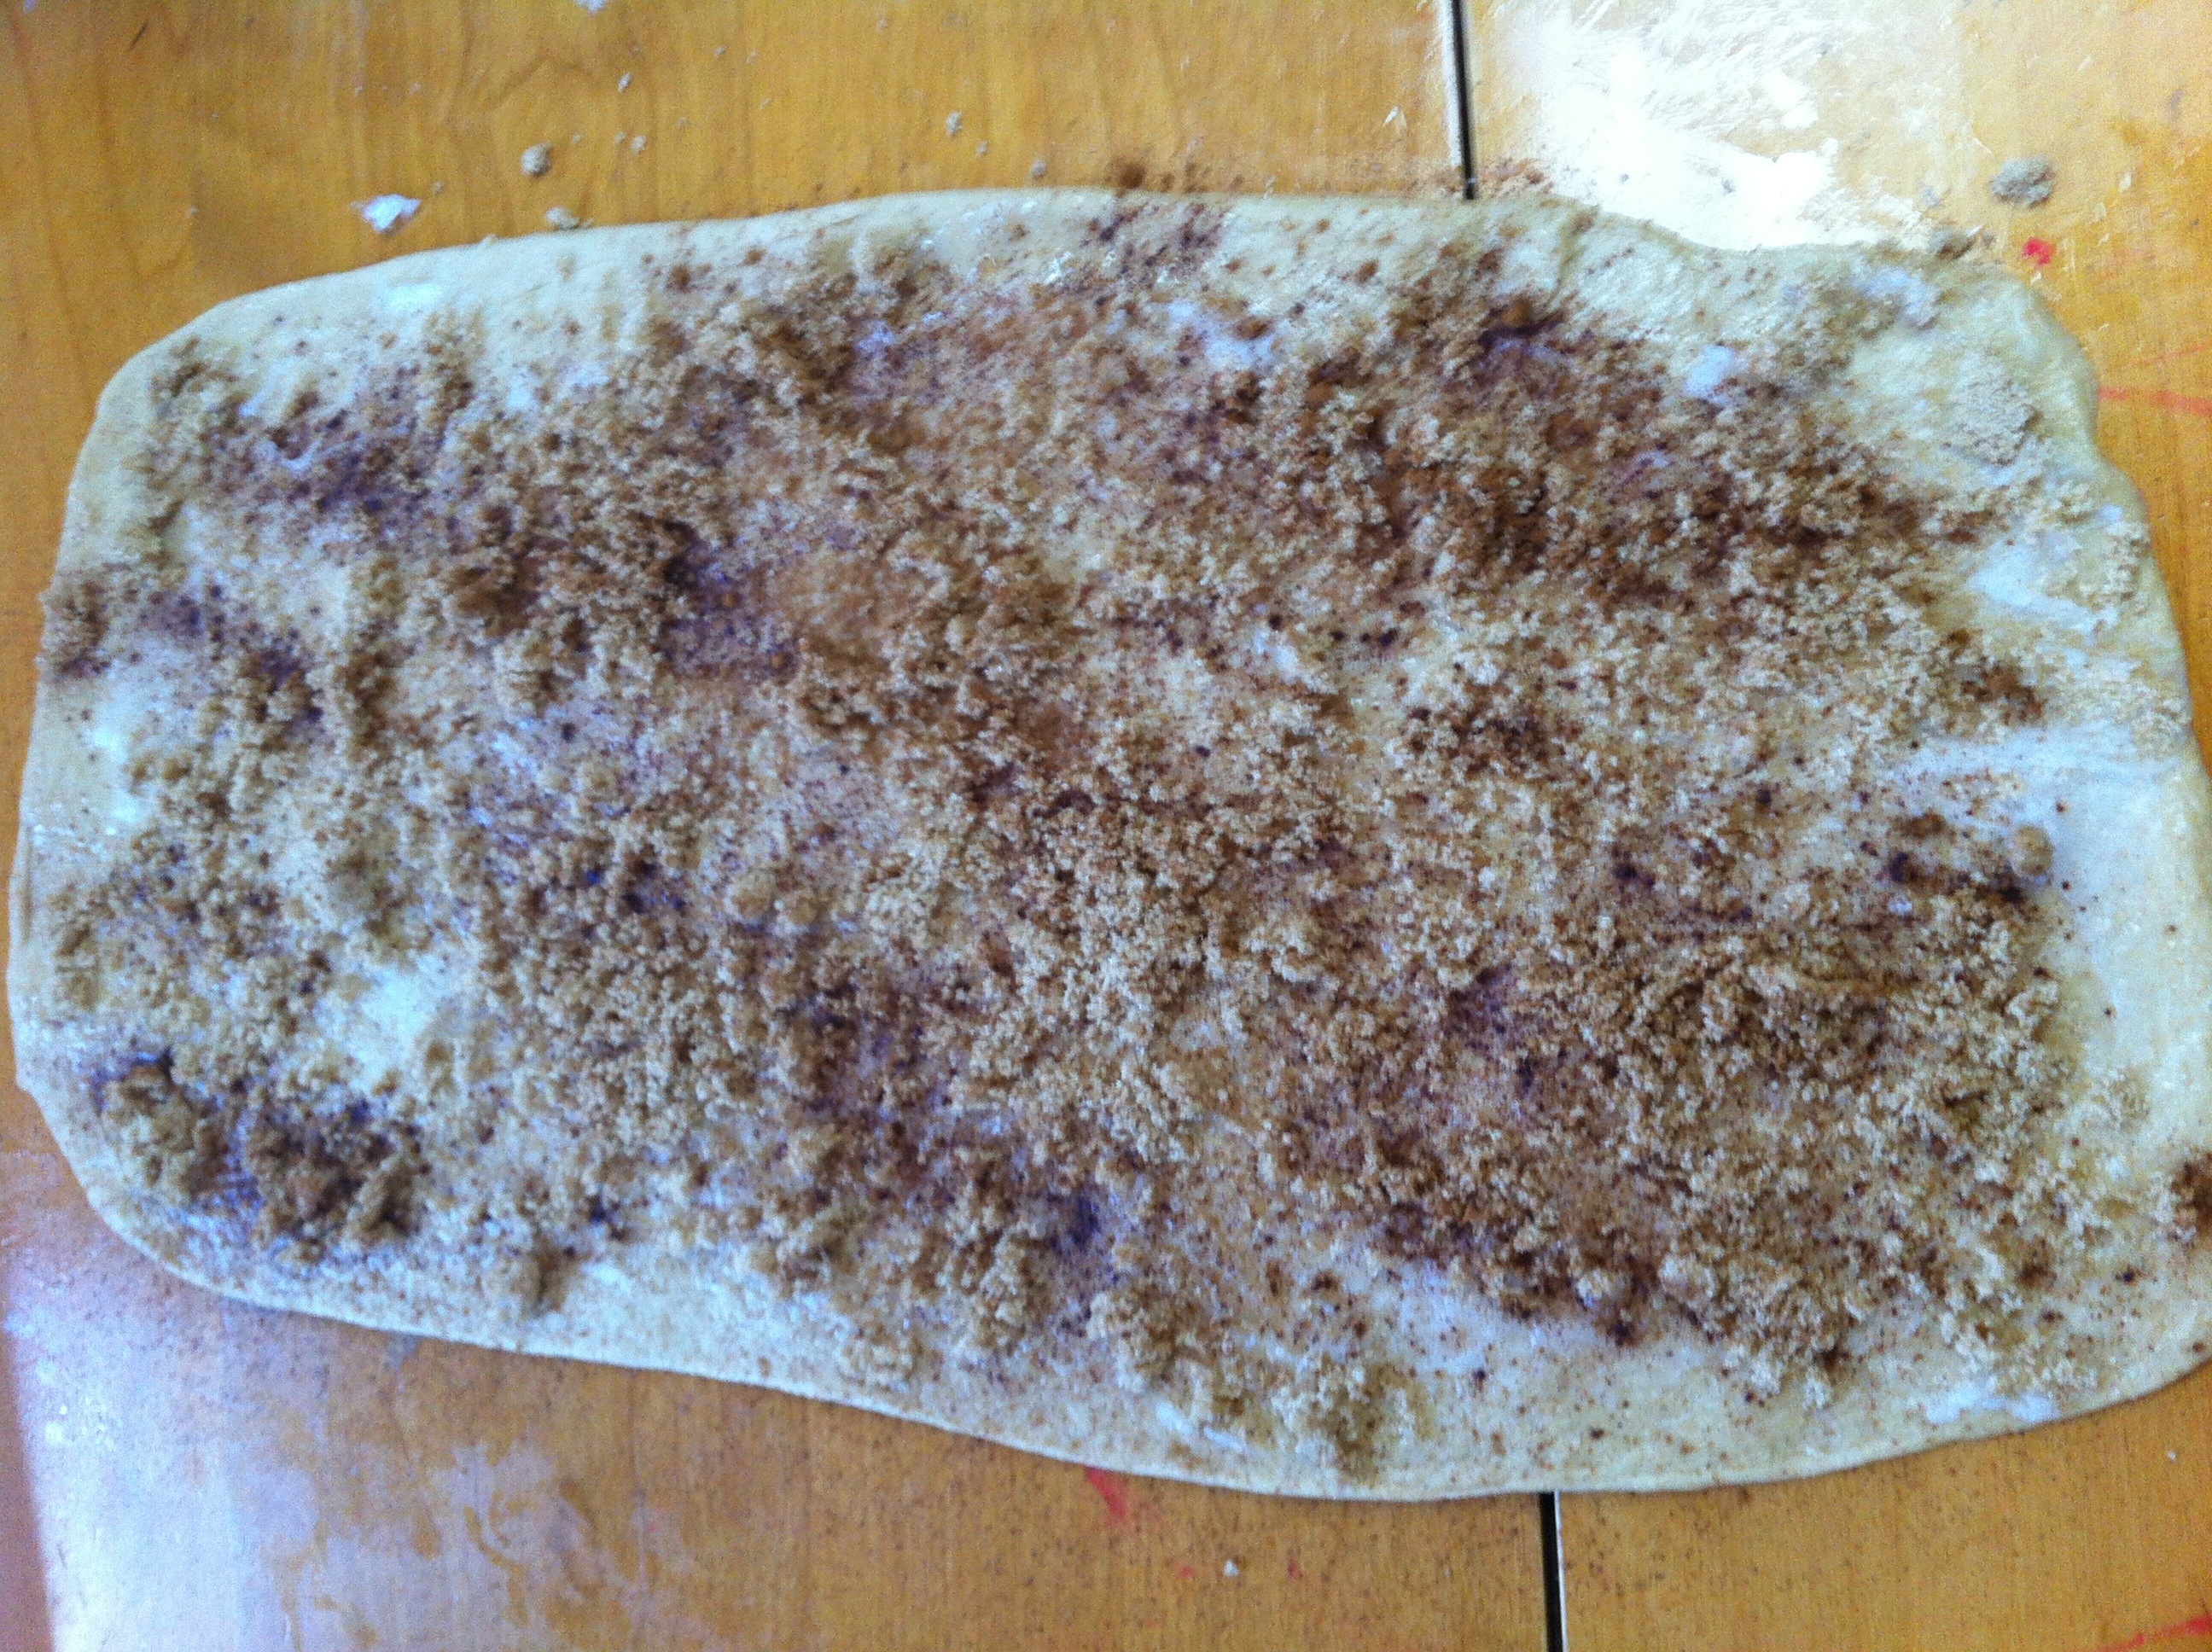
Starting with shorter edge, roll dough up pretty tightly {you just don’t want it to come unrolled as it rises because it is too loose.}

Pinch together the edge that is loose so it doesn’t come unrolled during the 2nd rise.

Cut with a serrated bread knife into 1 1/2″ – 2″ pieces.
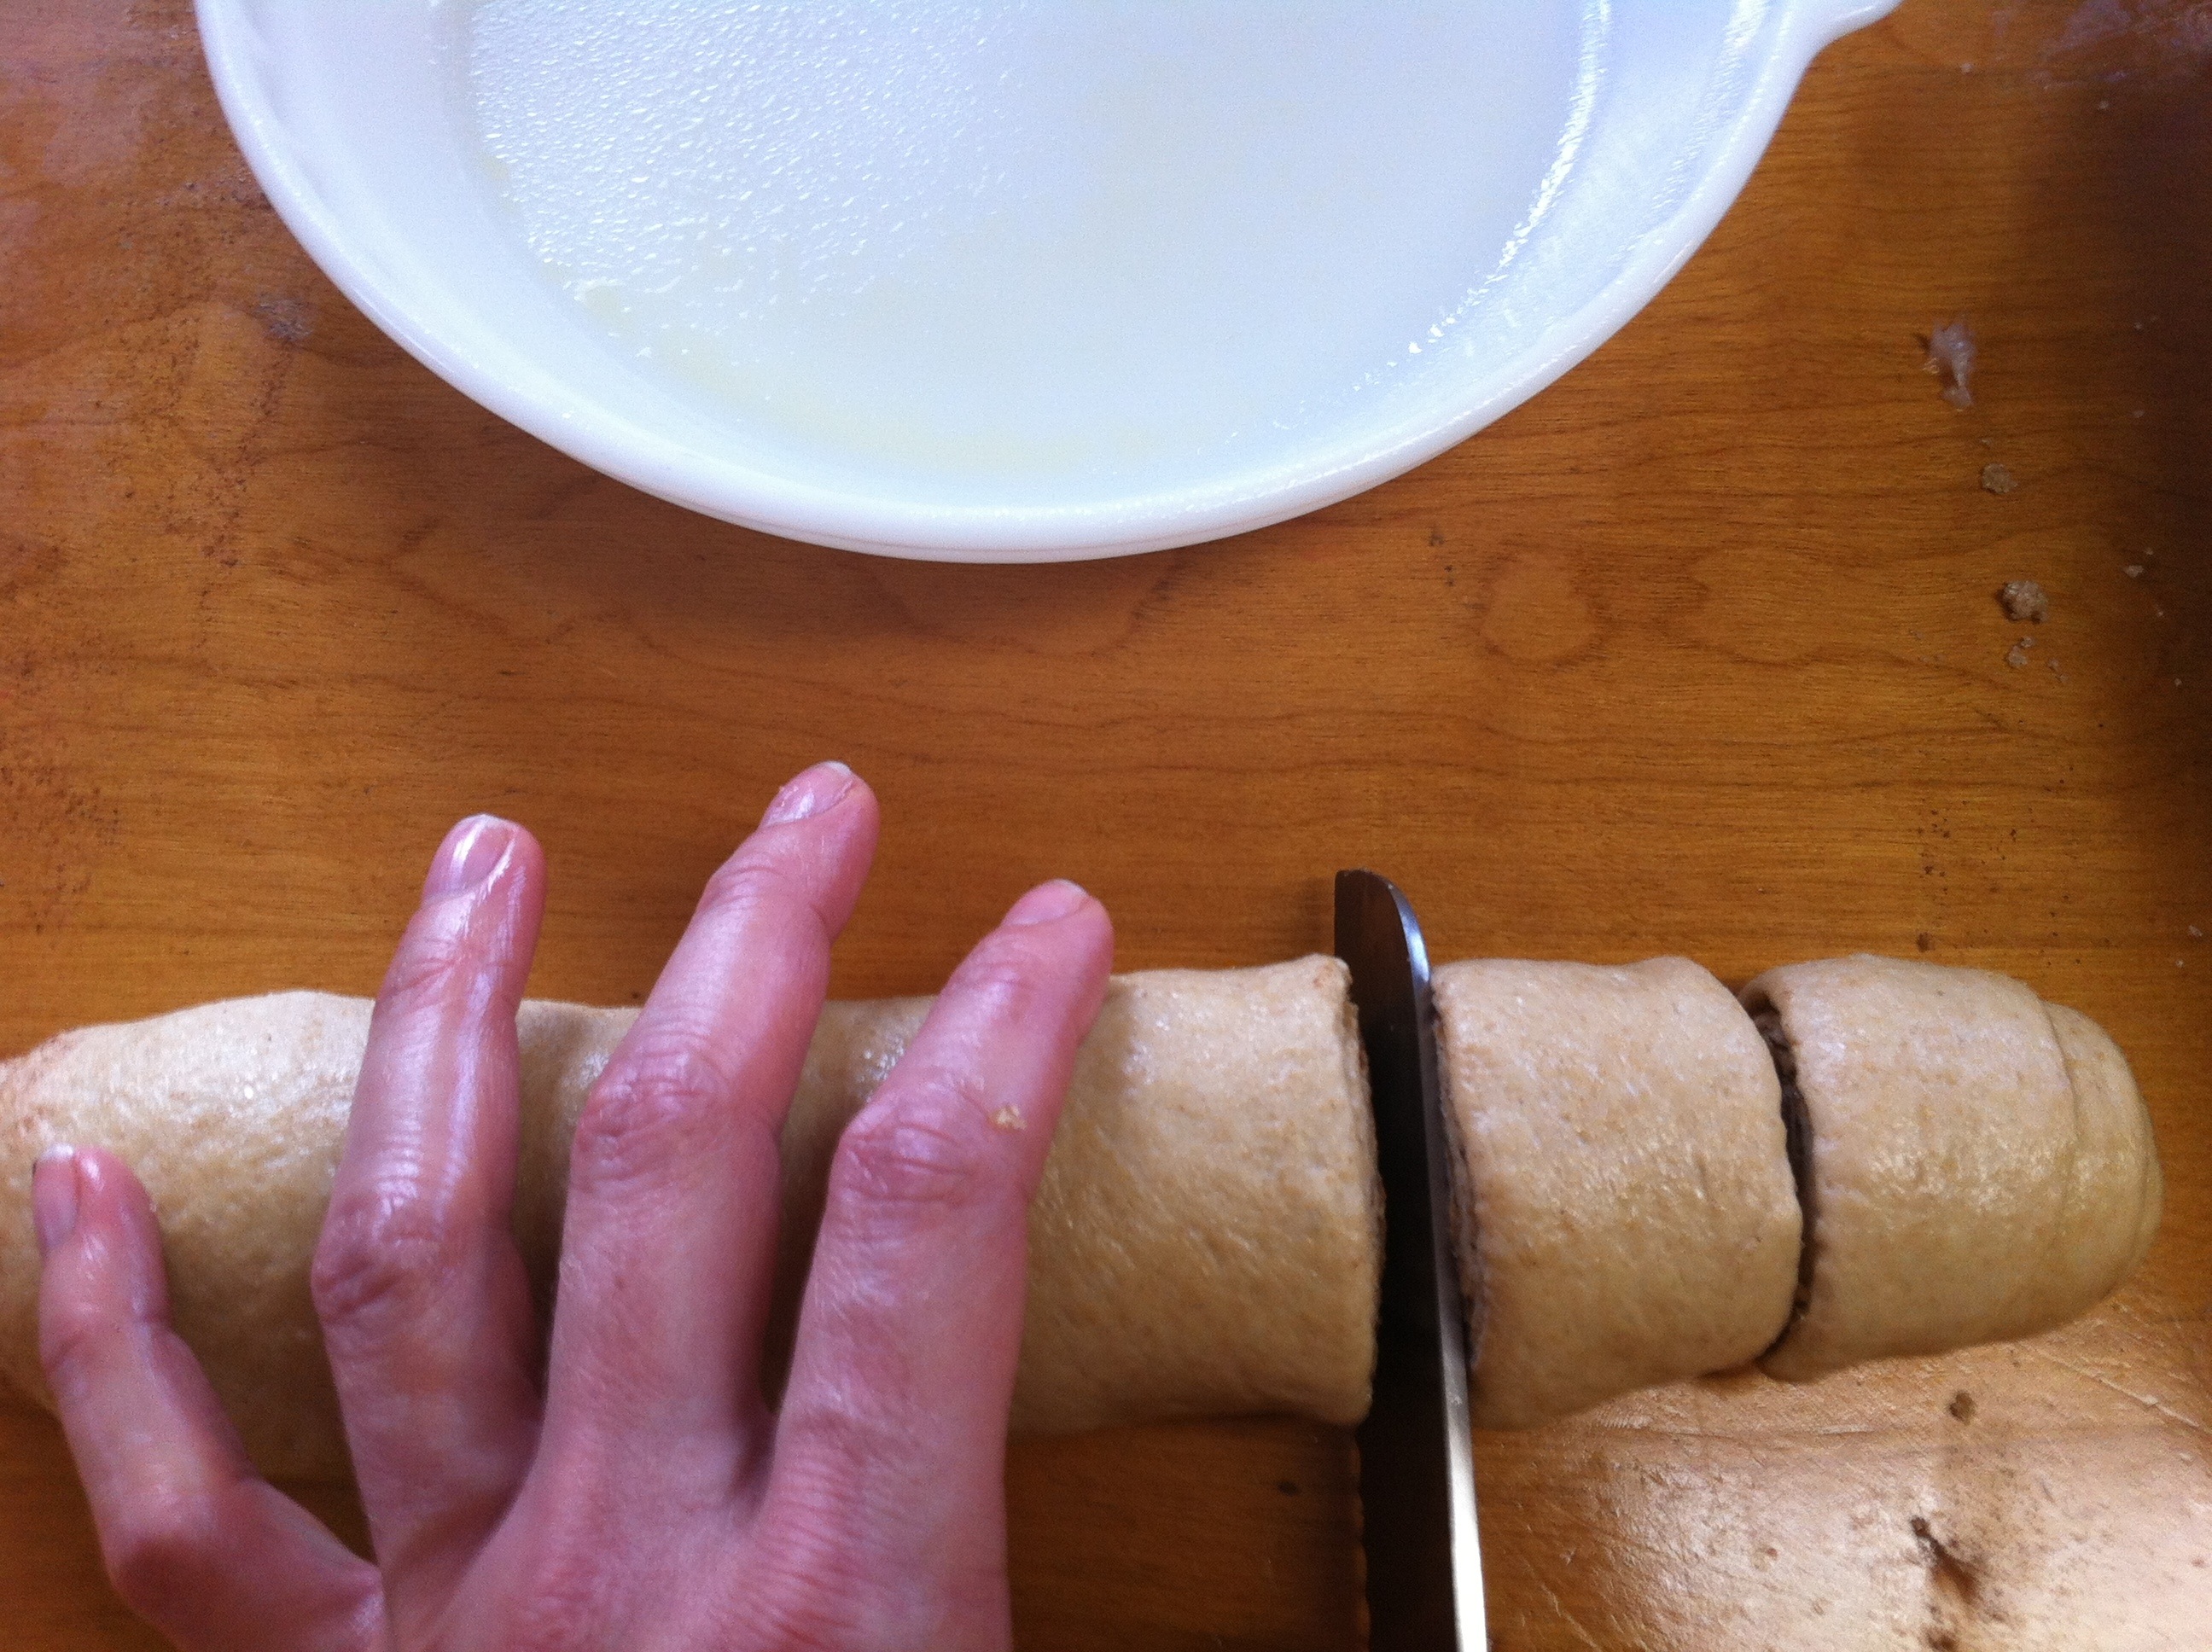
Place on greased pan {I used a small pie plate here because I didn’t have too many that I had made.}

Cover lightly with dish towel and allow to rise in a warm place until doubled in size.
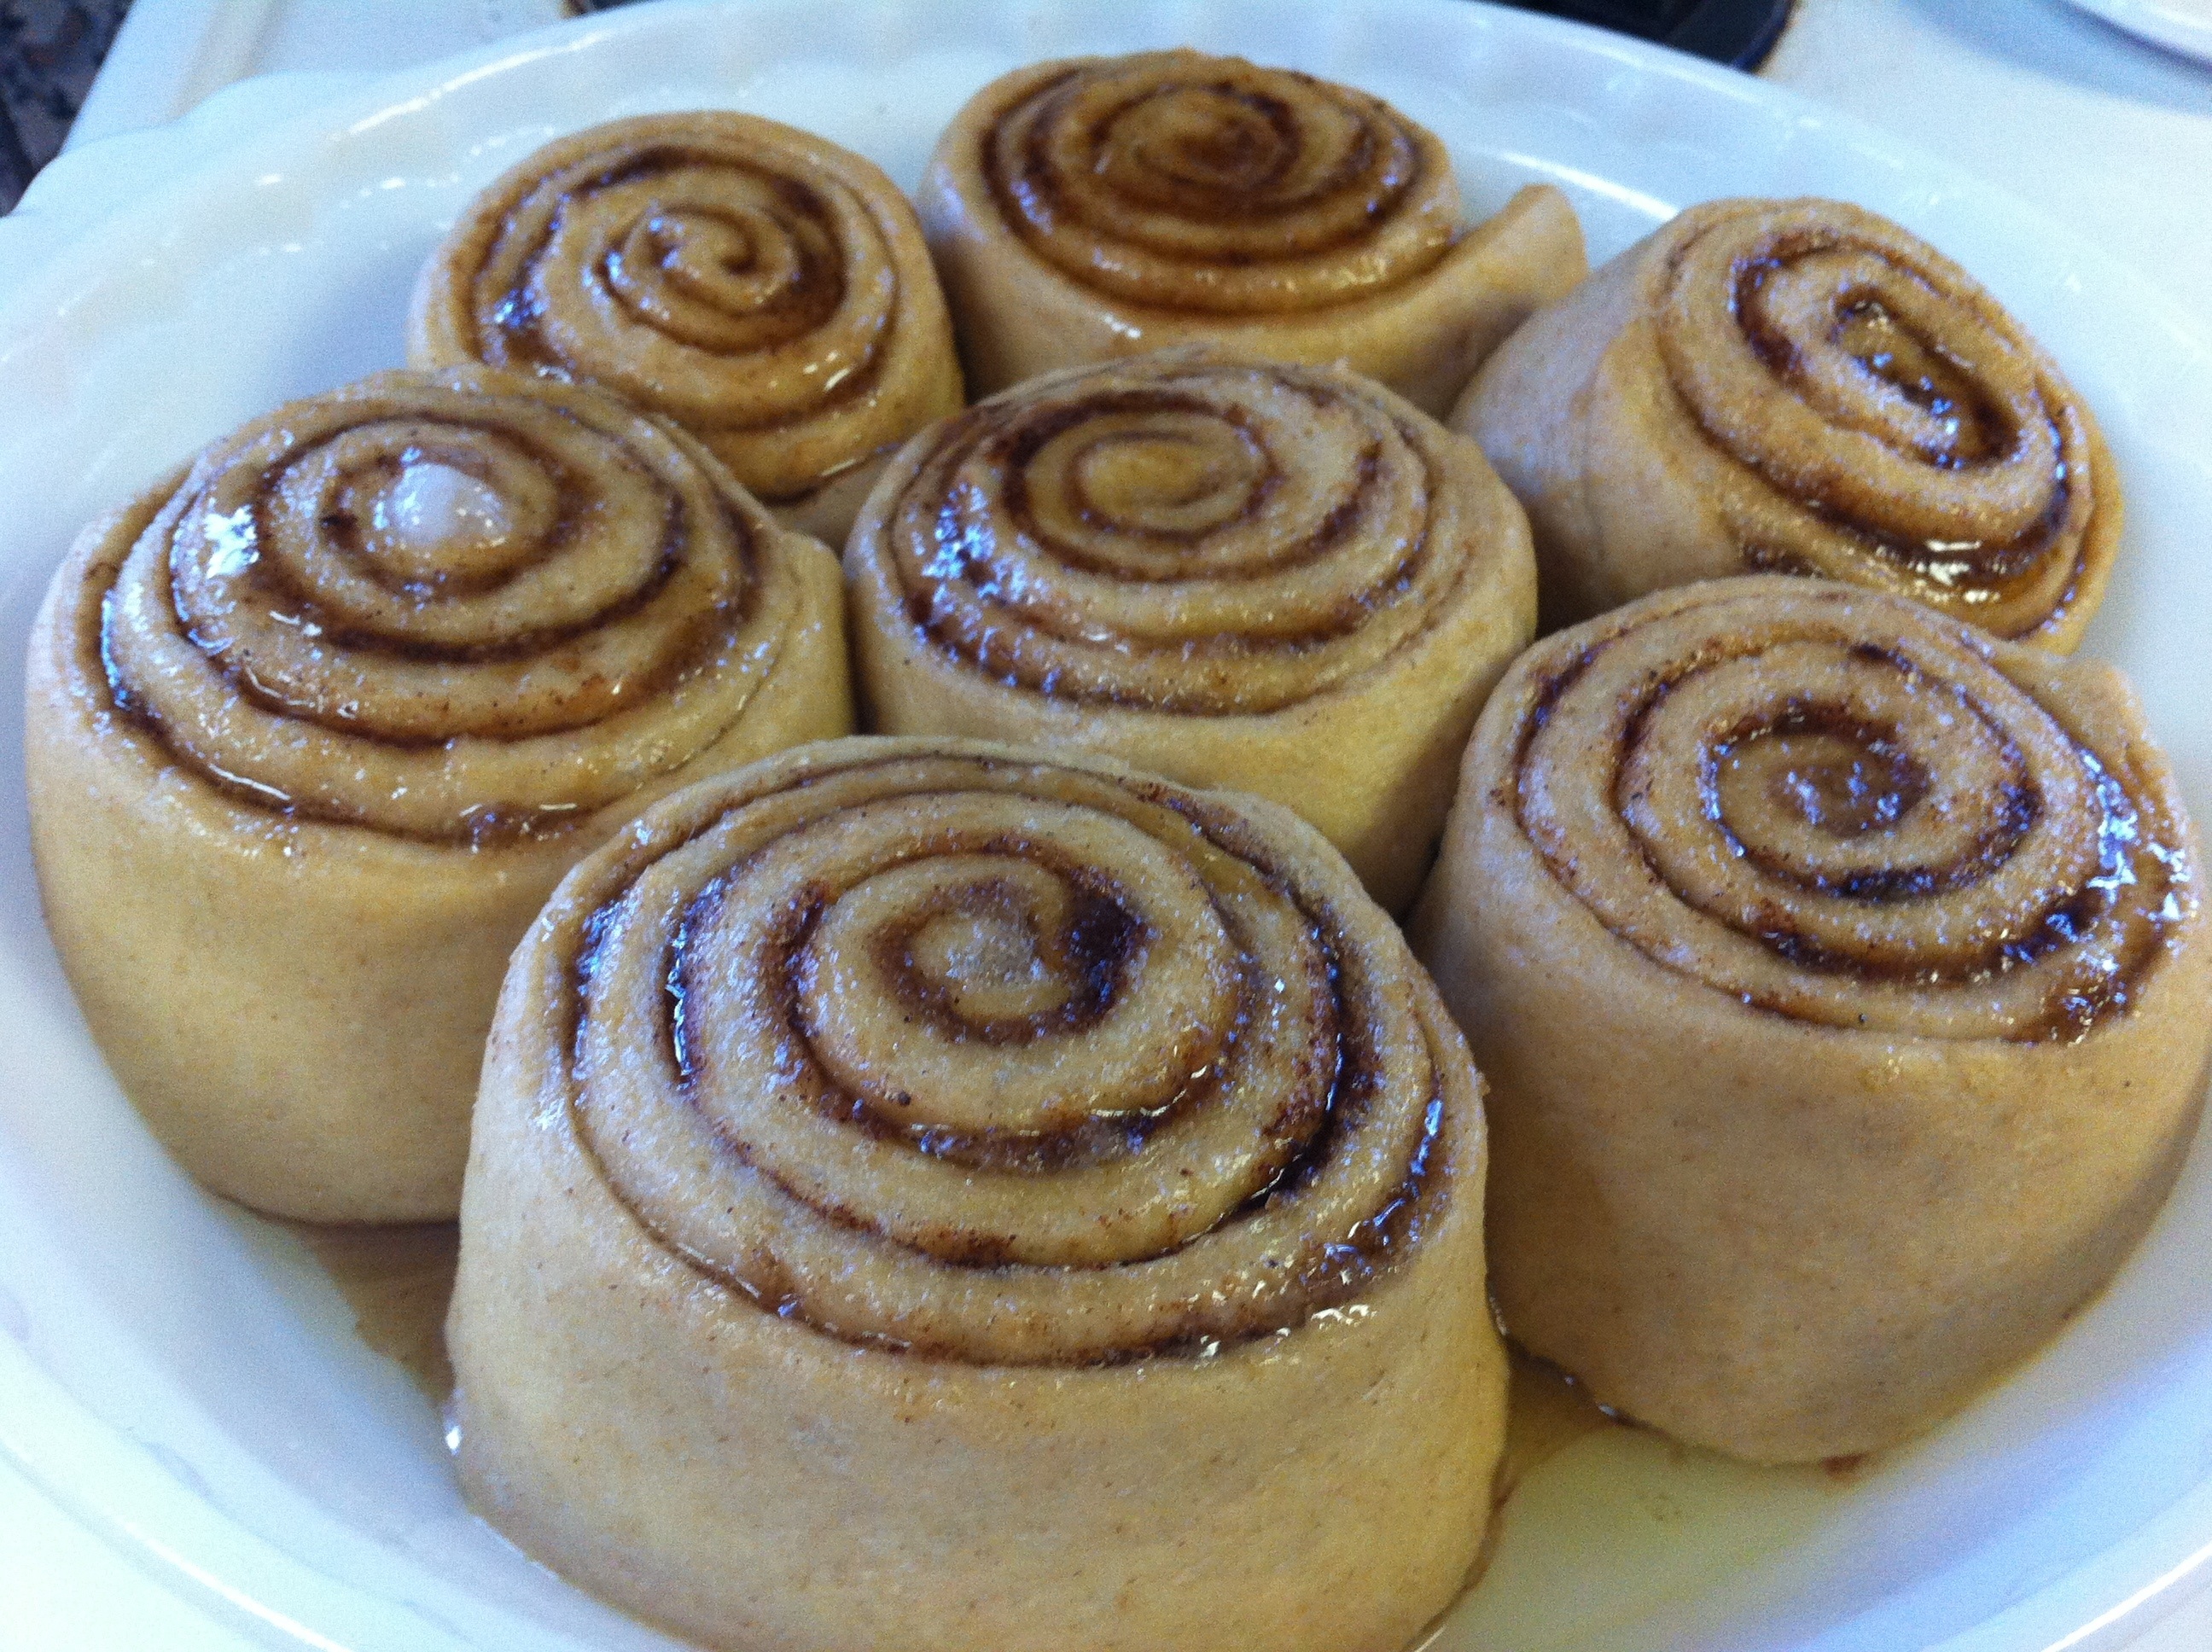
Bake in a 350 degree oven for 18-20 minutes. If desired make an icing glaze and drizzle over hot cinnamon rolls. {I just used powdered sugar with a little bit of vanilla coconut milk and mixed it until it was the right consistency that I wanted.}

Okay, so here is all of the variations that I made before they baked. {Please excuse the gouge mark in the loaf of bread. My two-year old son had been playing with some dough to the side and decided he wanted to help with what I was doing as well! *sigh* I have to say, after baking, the gouge took care of itself and wasn’t even visible!}
And after….
It smells wonderful in here and I guess I’ll let my family eat some now! I hope this Honey Wheat Roll Recipe was helpful to you and enjoy the upcoming baking! -Shelley
If you enjoyed this post you may also like…


Pingback: Whole Wheat Pancake Mix |
Pingback: Whole Wheat Drop Biscuit Mix |
Pingback: No-Knead Crusty Whole Wheat Bread {with an overnight rise} |
Pingback: Candied Sweet Potato Casserole |